


Oh Snap - Camera Cookie Tutorial
Who else out there still madly loves their camera? In the era of phone cameras, I see less Nikons and Canons around, but I still adore my Nikon camera and use it when I can. Not to mention that cameras are gorgeous pieces of technology! I thought it would be fun to create some sweet camera cookies for National Camera Day. These would also be the sweetest thank you gift for the amazing photographer in your life.
These camera cookies are a snap to make! You can make them with a square or rectangle cookie cutter. I stacked a few mini hearts in the lens for some of my cookies - I love that layered look! Have you ever layered a cookie for added dimension?
Materials
- square or rectangle cookie
- flood royal icing in: white, aqua blue and grey

- Flood a white lens in the center of your camera.
- Flood the bottom half of camera in aqua blue.
- Flood a thick white stripe above the aqua blue.
- Flood the top part of the camera in grey. Do not flood all the way to the top, you need room to ice a few dials.
All of these steps were done wet-on-wet, there is outline piping and it can cover any mishaps. If you don't like to wet-on-wet, you can dry before moving on to the next step.

- Pipe a small white rectangle in the grey icing while it's still wet, this will allow it to flow together.
- Pipe two small "dials" on the top of the camera on either side.
- Pipe an outline of the camera and lens reflection in grey icing.
- Add an iced mini heat to the lens if desired. I think it makes it super cute!!
Want to see a quick fun video on how I created mine? Just click the movie above! You'll see it's quick, low stress and so cute. You can change these up easy with some decorative touches or changing the colors up a bit. I think they are a perfect thank you gift for a special photographer in your life.

Are you looking for a perfect royal icing recipe? Come read mine - I use this recipe just about every day of the week! Oh snap - you're going to have the cutest cookies ever.
XO,
Jenny

Dreamy Pastel Unicorn Cookies
Do you dream of pastel unicorn cookies? Me too! These sweet unicorns were a recent request and I just fell in love. These are pretty easy to do and you'll find that they are wildly adored. Wouldn't these be a perfect dessert for a baby shower or girly birthday party? Maybe as a cupcake topper on a bed of fluffy white buttercream.

Materials
Although pastel icing isn't my go-to palette, I find that I'm working with it more and more. There's something about the soft sweetness that calls to me when I'm working with babies, weddings and magical sweets. To create this soft palette, I use the tiniest amount of Americolor gel in royal icing. This palette used: electric pink, electric orange, lemon yellow, leaf green, sky blue and violet.
My unicorn cutter was from one of my favorite Etsy sellers, Bobbi's Cookie Cutters. The shape is perfect - the horn and nose are not too long and fragile. These could easily be shipped in the mail with little fear of breakage.

And all that sparkly goodness on the pastel mane? Totally edible and delicious! You can pick yours up at Bakery Bling. I was over the MOON when I found this glitter - so much on the market is just non-toxic, which does not equate edible. This one is completely edible and has incredible sheen!
The unicorn is completed with some shiny gold touches. I used my favorite edible gold paint on the horn, snout and closed eyelid. It adds such a shiny sparkle to the cookies - a perfect touch to these magical cookies.
I just adore these magical unicorn cookies so much, I think it's my 80's inner child that misses unicorns. These are fun to make, you'll love having fun with the sweet mane. I hope you make these - let me know if you do! Want to watch my quick video? Click the movie above to see how I created mine.

Jenny

Shark Week Cookies
Squee - Shark Week is just around the corner! Are you ready? This is my first year of embracing the cult phenomenon, but I'm excited. Being the librarian that I was, I'm going to use Shark Week as a time to teach my kids about why sharks are cool and shouldn't be vilified, but I'm also going to teach you a totally creepy shark cookie!
No special cutter is required - I simply grabbed my largest oval and hacked off a bit off the top. You want to give him a pointed nose, but don't stress over the exactness. I was also thinking this shark cookie would be perfect on a cupcake! Can't you just picture his sweet face on a mountain of cool blue buttercream? Yum!

Materials Needed:
- oval cutter - just slice the tops into a pointy shape
- royal icing flood consistency - black, red, maroon,white and grey
- royal icing piping consistency - white

The first step is to flood the edge of the shark in grey. I created mine to look as if you can only see most of one side, but you can make him symmetrical if you prefer. I just wanted to make that side-eye creepy look!
My grey icing was created by using just a touch of Americolor black gel. Go slow when you are adding your colors - much easier to go too dark too quick. There is a great post on Lilaloa on how to create awesome pastel colors.

While the grey icing is still wet, carefully fill in the rest of the shark with flood white and leave an opening for his mouth. His mouth almost looks like a pair of boxer shorts, lol! Just keep it blank for now, we're coming right back to it.

Using a small cut in a tipless bag or using about a 2 tip, outline the mouth in bright red while the white icing is still wet. Take this slow and easy, as not to get too far into the white.

Now fill in the remainder of the mouth with a flood level consistency of maroon. Ideally, you want all of this background to melt into each other in the wet-on-wet style. If that's stressful or you have problems with colors bleeding, feel free to dry in a dehydrator between each color layer.

Now come back with a finely cut black icing bag and outline the grey areas of the shark, add an eye, outline the mouth and a few noncontinuous lines on his head. You will be surprised at how much this can help pop the colors and it can cover some minors mistakes if they were made.

And the final touch? Some sharp, irregular shark teeth! I used a piping thick white icing and added two lines of triangles. You can use a toothpick or icing scribe to elongate some of the teeth to sharp, long points.

Are you so excited for Shark Week? Do you have any favorite treats or traditions? This is our first year embracing it and I can't wait! These cookies are so fun and I hope you try them.
XO,
Jenny

Perfect Peach Mini Pies
Who doesn't love pies? I mean really, is there anything more perfect? From all American apple pie to rich, German chocolate. I love them all. And I love them even more when it's mini, because all desserts are even cuter when they are mini versions. Doesn't the little sugar encrusted lattice top kill you? It will slay at your next party!
This recipe makes a perfect dozen that fits in your regular muffin pan. You can easily double this recipe if you are in need of more for your occasion. These pies can be served hot with a big scoop of vanilla bean ice cream melting on top or they are amazing cold the next morning (someone has been known to eat one for breakfast.. what? It's fruit...) And their small size will make it easy for your party - no messy cutting and serving!

Pie Crust
Are you looking for an amazing pie crust recipe? I was too and I found my favorite crust recipe over at Six Figures Under! This pie crust recipe is crazy easy, fool proof and makes 20! I know 20 sounds like a lot of pie crusts, but I think you will be surprised by how fast you will use them and they freeze wonderfully. It is a shortening based crust which is far easier to create during these hot summer months too. Do you have a favorite crust recipe? Let me know in the comments!
Peaches
When you go to buy your peaches, there are usually lots of choices: white, yellow, cling, donut, etc. For this recipe, any variety will be fine - just pick what looks the most delicious. I've baked with just about every kind and they are all wonderful. I haven't found that peaches get soggy in pies like some other fruits can. In this featured recipe, I used yellow cling peaches and they were yummy!

Yum
Perfect Peach Mini Pies
By Jenny Rodriguez
These mini lattice topped peach pies will be wildly adored before they are gobbled up. Full of fresh chopped peaches and topped with a sugar crust drizzled in cinnamon glaze.
Prep time: 15 min
Cook time: 25 min
Total time:
Yield: 12 mini peach pies
Ingredients:
2 pie crusts (purchased or homemade)
2 1/2 cups chopped fresh peaches
1 tsp cinnamon
1/4 tsp ground ginger
1 tbsp light brown sugar
1 egg, slightly beaten (for egg wash)
large grain sugar (for sprinkling)
1/4 cup powder sugar (glaze)
1 tsp vanilla (glaze)
1 tbsp heavy whipping cream (glaze)
1/4 tsp cinnamon (glaze)
Instructions:

Glaze
I really wanted to add a sweet glaze to the tops of these pies, to make them a bit more like peaches n' cream. However that step isn't necessary. As you can see from below, they are gorgeous without the icing and are every bit delicious. Feel free to eliminate the glaze from your topping if so desired.

Mini pies are one of my absolute favorite summer desserts. It seems like all the parties are headed to the patio and my kids are running off as soon as the meal ends. So convenient to be able to hold these in your hand to enjoy - no messy cutting or stacks of dishes. It's super easy to change up with different fruits too!
XO,
Jenny

Raw Cookie Dough Recipe
I'm so excited summer is here - I love spending the days with all my babies in the pool, library and dollar theater. I don't love turning on the oven! In our new home, we don't have air conditioning (yet) and I try to keep the oven use to a minimum. But I'm a baker and we love cookies.
What to do? I wanted to try my hand at edible raw cookie dough. I love cookie dough! Cookie dough ice cream, frosting, brownies - you name it. Something about the creamy sweetness with chunks of chocolate. There are so many fun things you can create with it.. or you can eat it out of the bowl with a spoon.

It's super easy to make with only a few ingredients. But is it safe? While this recipe is egg-free, believe it or not, but what you have to worry about is the raw flour. There can be bacteria in the flour that we don't typically encounter because we bake what it's in. So how can we use raw flour safely? It needs to reach a temperature of 160 to be used in raw foods. I microwaved mine for 75 seconds in 15 second intervals and it worked great!
Yum
Raw Chocolate Chip Cookie Dough
By Jenny Rodriguez
This delicious raw cookie dough is easy and perfect! A wonderful addition in ice cream, frosting and more.
Prep time:
Total time:
Yield: 1 dozen raw cookie balls
Ingredients:
1/3 cup flour*
6 tbsp light brown sugar
1/2 tbsp vanilla extract
1 tbsp heavy whipping cream
4 tbsp butter, softened
1/4 cup mini chocolate chips
Instructions:
Want to see how quick this delicious cookie dough batter comes together? Click on the YouTube video above and learn how to make this treat in 5 minutes or less! I can't wait to make more variations on this recipe. Maybe a pumpkin spice dough that can be used in chocolate covered bonbons for autumn?

These are quickest, tastiest desserts ever! I have some big plans for how to use them in a summer treat, so I hope you come back soon. If you try these raw cookie dough balls, please let me know how you like them and what you used them in.

XO,
Jenny
Pst! Are you looking for a roll-out cookie dough recipe? Come try my Cotton Candy Cookies!


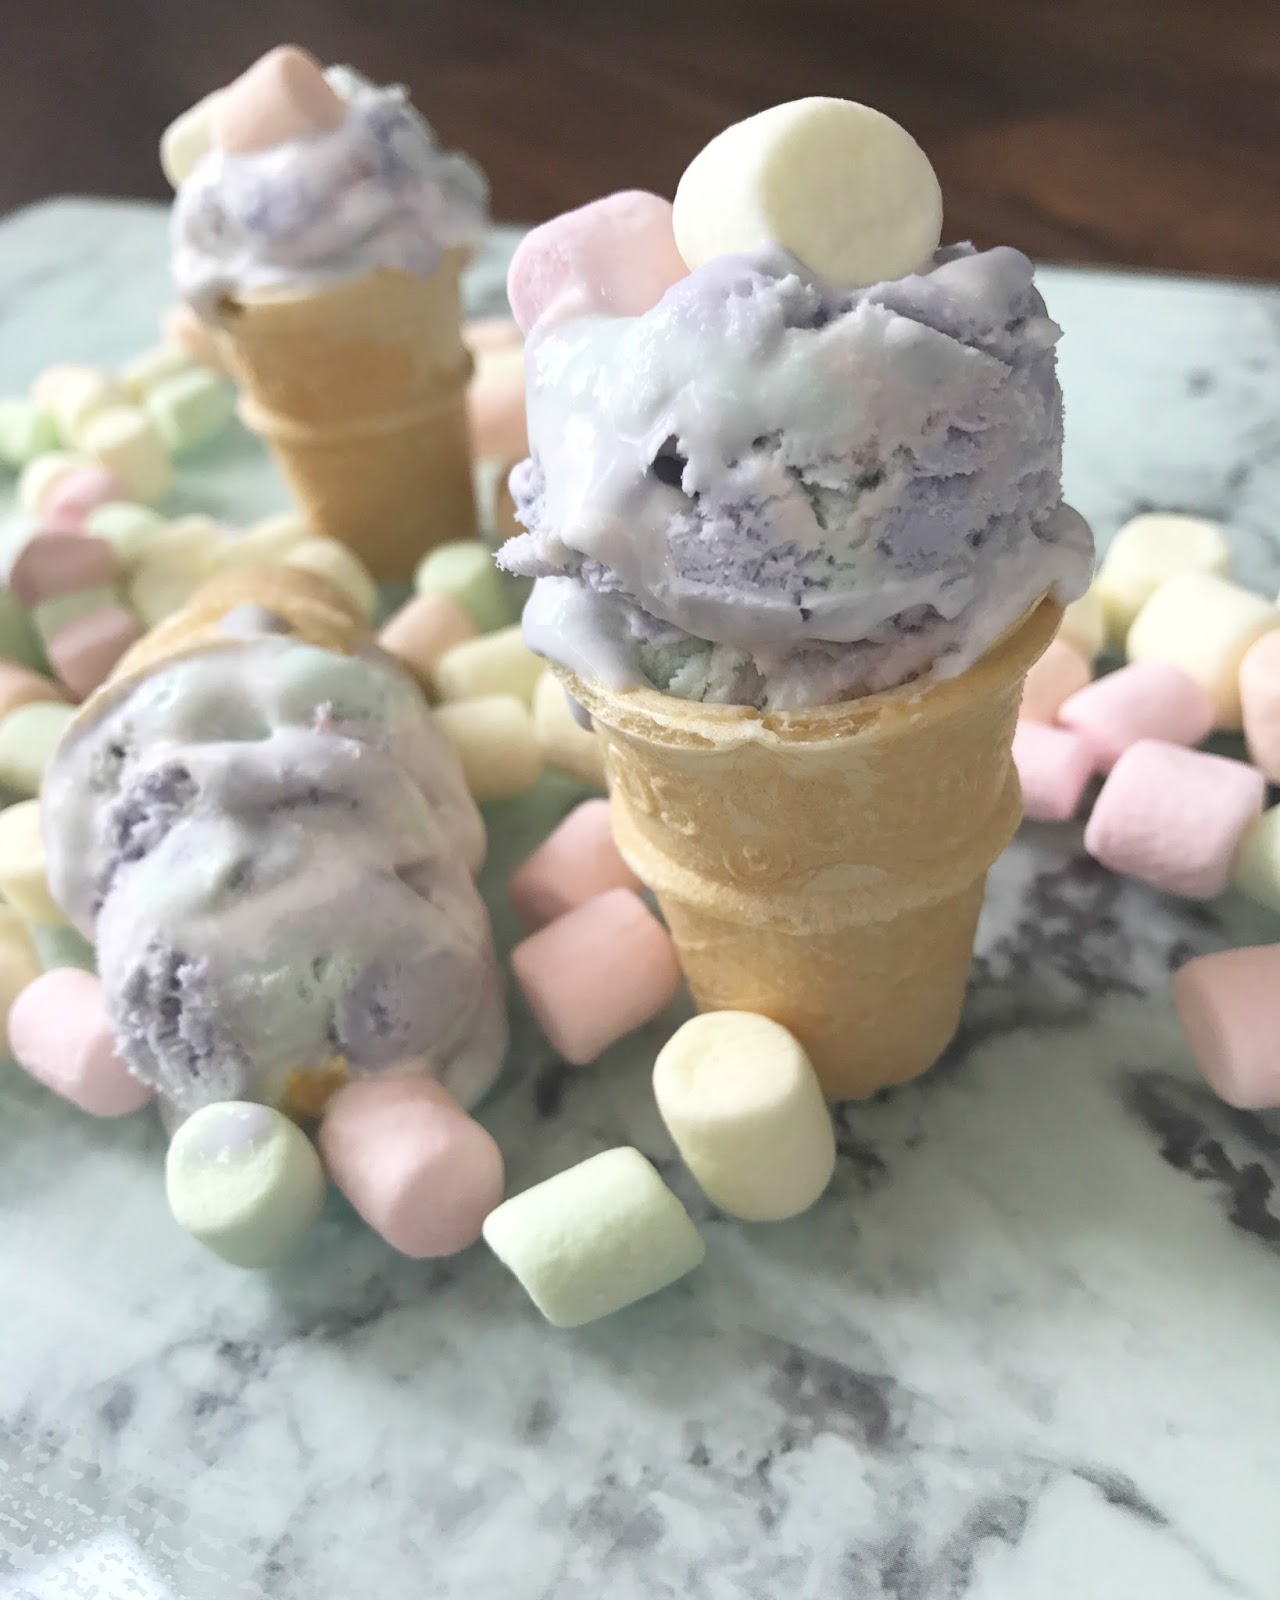
Marshmallow Cotton Candy Ice Cream
I admit it, I'm on bit of a no-churn ice cream craze. It's just so easy and yummy! I've been loving the unicorn craze and wanted to create something magical, but not overly bright. I asked many of my friends what a unicorn magical ice cream would taste like. They answered in various forms of fruity and marshmallow.. something light and sweet.
I came up with a double marshmallow cotton candy flavored ice cream. The ice cream is flavored with three different types of cotton candy floss sugar, a layer of homemade marshmallow creme and ooddles of fruity mini marshmallows. It's a bit of soft, sweet heaven.

Cotton Candy Floss
Cotton candy floss comes in various delicious flavors. It gave the ice cream a soft rainbow hue and fruity flavor. I used cherry, grape and blue raspberry in this ice cream. I purchased it off Amazon here. but I have seen it for sale at local restaurant supply stores as well.
Marshmallow Creme
I really wanted to try my hand at making marshmallow creme instead of purchasing it at the store. I found a delicious recipe at Eating On A Dime. It is incredibly easy to make, I doubt I would buy it again. So delicious and yummy! I placed scoops of it layered in the ice cream - you will love it's softness, but it doesn't freeze hard, so be ready to gobble it down.

Marshmallow Cotton Candy Ice Cream
By Jenny Rodriguez
A light and delicious cotton candy flavored ice cream with ribbons of homemade marshmallow creme and bites of fruity mini marshmallows.
Prep time:
Cook time:
Total time:
Yield: 1.5 quarts
Ingredients:
1 cup marshmallow creme
2 tbsp. cotton candy floss flavoring in: cherry, grape and blue raspberry
2 cups heavy cream
14 oz. can sweetened condensed milk
1 cup fruity mini marshmallows
Instructions:

XO,
Jenny


Easy Fondant Decorated Batman Cupcakes
My little man had the best Batman birthday ever! I'm always torn on my children's birthdays if it's better to bake their cake or buy it. I love spending the time and love on their birthday cake, but sometimes I wonder if they would prefer that time spent playing with me. So I let them decide which they would prefer. I've also found that super cute, decorated cupcakes are a great way to make them cake, but not spend half their birthday working on it.
I knew I wanted to create Batman cupcakes that Tommy would squeal over! Batman's noticeable colors are black and yellow, but I didn't want black icing at the party. Blech - no one wants to send a bunch of cute preschoolers home with black dyed teeth, lol! My solution? Dark chocolate cupcakes filled and topped with lighter than air vanilla buttercream with a Batman cupcake topper.

You can use store bought or homemade marshmallow fondant. Dye it with a bit of yellow food gel. I mix it together while wearing gloves. Why? It will spare you yellow dyed hands and fondant will pick up any spare dust on your hands. You don't want that on your toppers!

Roll out your fondant to 1/8" thick and cut with a scalloped circle. This cutter was about 2.5" in diameter. Set aside and place in a dark, dry box. Allow to stiffen for a day or two; this is a perfect step you can do in advance of the party.

You will also need black Batman royal icing transfers. How to make them? Print out a sheet of your desired Batman logo. Place a piece of parchment on top or you could use a cut up Ziploc. Using piping thick black royal icing, copy the design on the parchment or Ziploc. These can sometimes be fragile, so make a few more than needed. Allow them to dry for 24 hours and they should just pop off. Store in a cool, dry spot until needed. This is another great step for a day or two before the party!

Bake your favorite cupcake and decorate sky high with buttercream, I choose a vanilla to spare the kiddos from dyed teeth! I also decorated with the most gorgeous silver sugar.
Are you short on time? Go get some delicious cupcakes from your local bakery - I won't tell! And with your fondant decorated Batman toppers, no one will ever know.

Gently place a fondant circle on your buttercream and drop a large dot of black royal icing in the middle. Carefully place a dried Batman on the icing and allow to firm up. I do all of this just before setting the cupcakes out for the party. The buttercream will soften up the fondant once they are touching.

Want to watch a video on how I created the cupcakes? Click the YouTube movie below for all the details! Have questions? Let me know!
XO,
Jenny

My Favorite Thing To Do With Daddy..
Father's Day is around the corner, are you ready? I always struggle with what to give my amazing husband and father. In the end, I think they are similar to moms - they want to know that they are appreciated and loved.
Every year I come up with a new cookie theme set for Father's Day. This year I wanted to create something really special given all the changes in our lives. I know my husband has worked incredibly hard finding a new job, moving his family and doing anything he could to keep us all happy.

My children are at an age now where they can be more involved with gift buying and making. I wanted to include them in this cookie set, after all it's their sweet lives that have made him a father. I was inspired by my son's Preschool Father's Day gift. One of the questions in his card to fill out was, "What is your favorite thing to do with Daddy?"
And what do my children love to do with their Daddy? They love doing archery, riding bikes, being treated to ice cream and playing with him outside. I won't soon forget their little faces as they thought about their answers. That man is so incredibly loved by his children.

My decorated cookies are not unique in our home anymore. I know my husband would have appreciated anything I made, I really wanted something that would be more meaningful. I decided to hand the icing over this year. I baked all their sweet memories and flooded them in white. This step gave the cookies a nice even layer and blank canvas for them to work on.

I made up an assortment of rainbow colored icings and left them alone. They could decorate in any way they wanted. My only rule? Don't squirt icing into our mouth. I know, I know - I'm the meanest mom ever!
They had so much fun and they were ecstatic that I trusted them to make these special treats. This is a great activity to do with him - it's fun and you get to listen to all of their favorite memories. I know that my husband will always remember these sweet treats and how much he is loved by them.

I do recommend giving the kids a small cookie before or after to enjoy. That was the only hiccup and I saw it coming. They love cookies too, lol! Maybe bake a few extra hearts for them to decorate and gobble down after their hard work.
I hope you try this activity, I think it may become a new family tradition for us!
Happy Father's Day to all those men out there that help raise, love and hold our children dear.


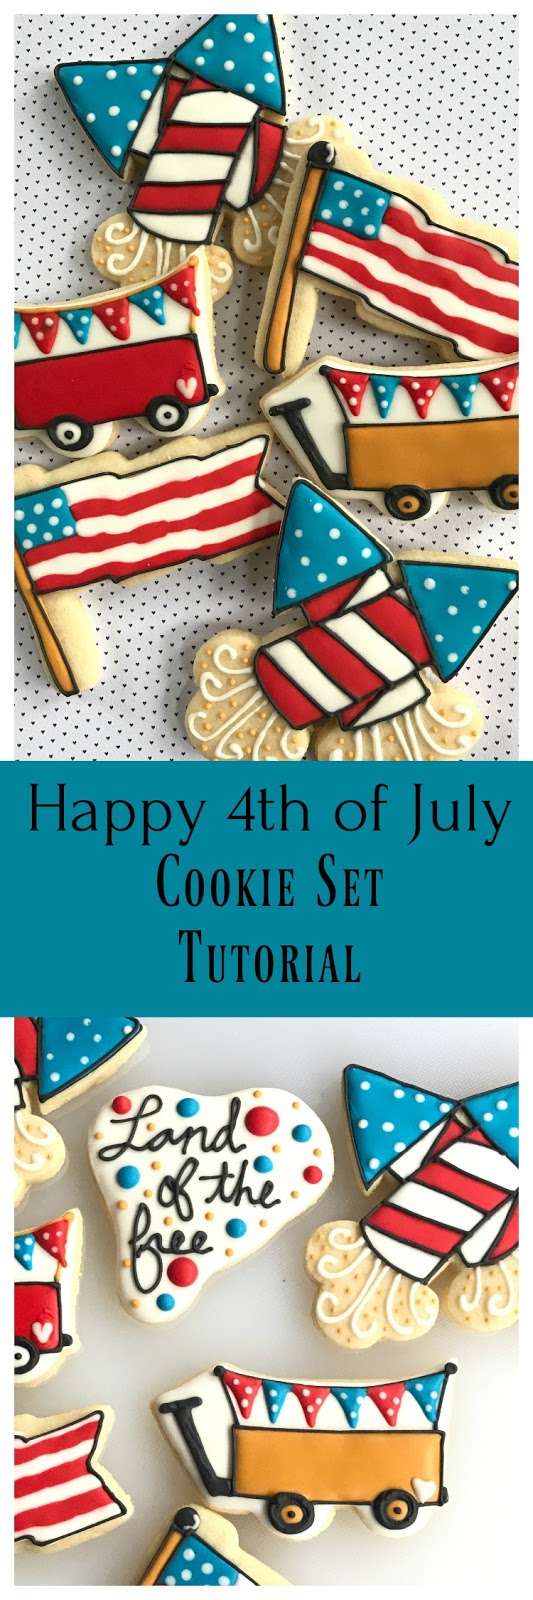
4th of July Cookie Set
I love the 4th of July. It's one of my favorite holidays and has been since I was a child. I so vividly remember the excitement of fireworks outside in the front yard with my family. There was something rebellious and wonderful about getting to stay up late to light glittery sparklers.
When my parents first moved to Vancouver, WA they found the sweetest parade. All the children decorate their red wagons, scooters and bikes in red, white and blue. The children wave their little American flags and just beam with pride. It gives you hope.
This year my children can't wait to be a part of that fun parade and have already started planning on how to decorate their bikes. It's so sweet and makes me appreciate this country all the more.
When Shey of SheyB Cookie Designs asked if I would be interested in designing a July set of cookie cutters, I was thrilled! What an amazing opportunity and I already had the scene in my head. I couldn't wait to make and bring these ideas to life. You can buy them soon at her store over here.

When my children were young, I hated fireworks. Oh the noise! It seemed liked as soon as I would get them to sleep, BOOM BOOM. But now that they are older, we all love them again. I love to watch their faces full of excitement as the colors burst in air!
These firecracker cookies are a snap! What do you need?
- black and gold piping thick icing
- white, blue, and red 15 second flood icing
All of the icings were used in tipless bags and were created wet-on-wet. You'll see that I do the black outline twice - it's a little trade secret. The first round of outlining helps you ice with clear definition of where everything goes. However, the flood icing always spreads a little too much over on the outlines and you lose that coloring book appeal.
Be careful when icing the second time, this is what will stand out. Never dip your tip on to the cookie, just hover slightly above it.So gorgeous when you are done!

The decorated wagon cookies maybe my favorite. There something about the sweetness and love of a child. These are equally easy - just break it down into shapes.
What do you need? Same as the firecracker:
- black and gold piping thick icing
- white, blue, and red 15 second flood icing
Wouldn't these be adorable with the child's name personalized across the wagon? I just love it and I'm busy coming up with alternate themes we can do with this sweet cookie cutter.

And of course, our flag softly waving in the breeze. This is a great one if you are wanting to try more wet- on-wet. The flag stripes are not intended to be straight lines, so don't stress! It's a flag waving in the air, the lines should cascade down and slightly jagged. I've always loved impressionism art most, embrace that looseness with this one and you will be happy!
I hope you love my very first design of cookie cutters. It was an absolute dream come true and I can't wait to bring you more designs. So check in with Shey soon - she has such an amazing line of cutters. I want that giant unicorn cookie cake!!

XO,
Jenny
Subscribe to:
Posts (Atom)
