Showing posts with label decorated cookie. Show all posts
Showing posts with label decorated cookie. Show all posts

Golden Snitch Cookie Tutorial
It's that time of year again when my amazing friend Marissa of Rae Gun Ramblings hosts her annual Harry Potter bonanza for all us Muggles! There will be tutorials, inspiration, giveaways and so many amazing blogs. If you have ever dreamed of attending Hogwarts or playing quidditch, then you will have to join us for the magical blog ride.
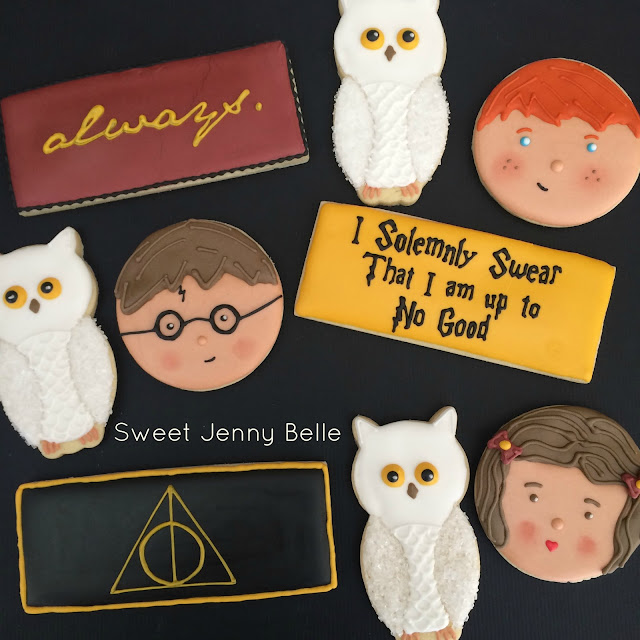
I thought long and hard about what kind of cookie I should create for this year's Harry Potter party. I wanted to create a set that might speak to an older crowd - refined and dramatic. I worked with a small color palette and selected a few visuals to play with.
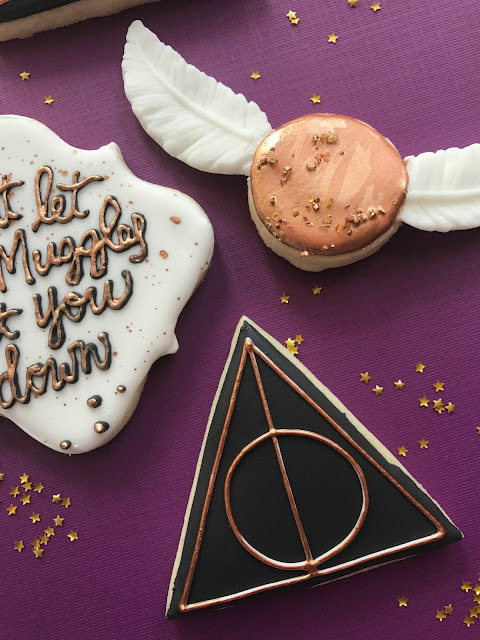
There has always been something about the quidditch game that I loved. Or maybe I just want to ride around on a broom. I wanted to create a golden snitch that would be magical and a new cookie style. For this snitch, I've added white fondant wings for such a fun way to create dimension.
Materials needed:
- small round cookie
- white royal icing
- edible gold paint
- white fondant
- silicone wings mold
- edible gold stars or sprinkles (optional)
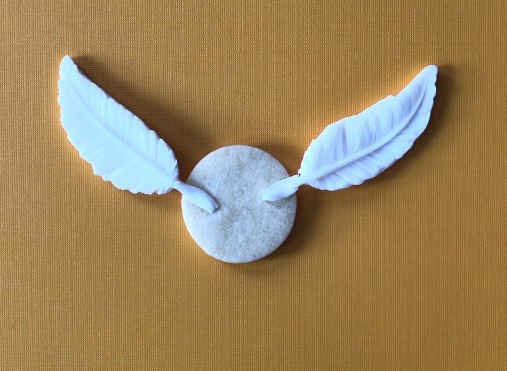
The first thing you need to do to create these flying, golden snitches is to create the fondant wings. For this cookie, I actually used a feather mold - I liked how delicate and long this particular mold was. Take a small bit of fondant (homemade or store bought) and push it into the mold. Place in the freezer for about 10 minutes and pop out. I let mine stiffen up overnight in a cool, dry box. Create 2 feathers for every snitch cookie that you are making.
Next you will position the fondant feathers on your round cookie. Gently press and flatten the fondant ends of the feather into the cookie. This will help anchor the fondant and make it more stable.
Now outline and flood the cookie in white icing. You will completely ice over the area of the fondant that is on the cookie. Allow to dry for 10 minutes in a dehydrator at 90 F or at room temperature for a few hours.
Your final step to finishing the golden snitch cookie, is painting a layer of edible gold paint all over the cookie. There are a number of options on the market, just choose your favorite. This adds such a gorgeous sheen. Your Hogwarts fans, old and young, will love this sparkly cookie! I added a few edible stars and sprinkles while the gold paint was still wet.
Aren't these quidditch cookies a showstopper?! They are fragile, so please treat with care and this may not be one that you will want to ship. However, they are easy to make and I think are my most favorite Harry Potter cookie to date.
Want to see a quickie video of creating the cookie? Unfortunately it was crazy overcast in Washington and my hands have a weird purple hue in the video, but it will show you exactly how I made mine.
DON'T FORGET!
This year's Happy Harry Potter giveaway winner will give a fun package including:
- $50 Amazon.com gift card
- Make Love Not Horcruxes Book Bag and Custom Hogwarts House Tie Necklace from Rae Gun Shop
- Bookish Swag from CrateJoy which has loads of HP and fandom related subscription boxes.
- Four Stunning Harry Potter Printables from Sisters What!
Are you looking for more Harry Potter cookie tutorials? Come visit the Harry cookie I created last year! And of course, lots more inspiration cookie ideas for your party or client!
XO,
Jenny
2 Comments
Categories:
contest,
cookie decorating,
decorated cookie,
DIY,
giveaway,
golden snitch,
harry potter,
hogwarts,
magical,
tutorial
Oh Snap - Camera Cookie Tutorial
Who else out there still madly loves their camera? In the era of phone cameras, I see less Nikons and Canons around, but I still adore my Nikon camera and use it when I can. Not to mention that cameras are gorgeous pieces of technology! I thought it would be fun to create some sweet camera cookies for National Camera Day. These would also be the sweetest thank you gift for the amazing photographer in your life.
These camera cookies are a snap to make! You can make them with a square or rectangle cookie cutter. I stacked a few mini hearts in the lens for some of my cookies - I love that layered look! Have you ever layered a cookie for added dimension?
Materials
- square or rectangle cookie
- flood royal icing in: white, aqua blue and grey
- Flood a white lens in the center of your camera.
- Flood the bottom half of camera in aqua blue.
- Flood a thick white stripe above the aqua blue.
- Flood the top part of the camera in grey. Do not flood all the way to the top, you need room to ice a few dials.
All of these steps were done wet-on-wet, there is outline piping and it can cover any mishaps. If you don't like to wet-on-wet, you can dry before moving on to the next step.
- Pipe a small white rectangle in the grey icing while it's still wet, this will allow it to flow together.
- Pipe two small "dials" on the top of the camera on either side.
- Pipe an outline of the camera and lens reflection in grey icing.
- Add an iced mini heat to the lens if desired. I think it makes it super cute!!
Want to see a quick fun video on how I created mine? Just click the movie above! You'll see it's quick, low stress and so cute. You can change these up easy with some decorative touches or changing the colors up a bit. I think they are a perfect thank you gift for a special photographer in your life.
Are you looking for a perfect royal icing recipe? Come read mine - I use this recipe just about every day of the week! Oh snap - you're going to have the cutest cookies ever.
XO,
Jenny
Dreamy Pastel Unicorn Cookies
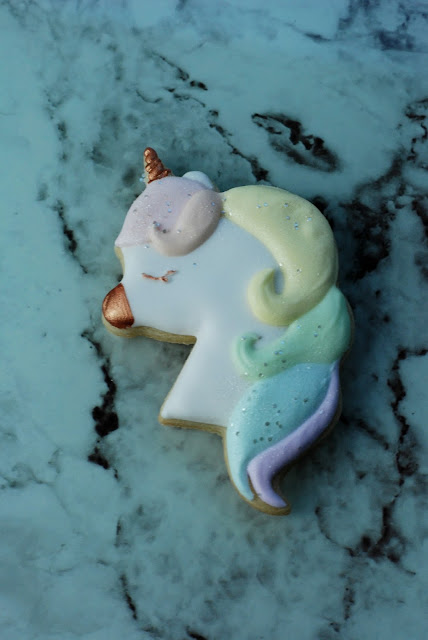
Do you dream of pastel unicorn cookies? Me too! These sweet unicorns were a recent request and I just fell in love. These are pretty easy to do and you'll find that they are wildly adored. Wouldn't these be a perfect dessert for a baby shower or girly birthday party? Maybe as a cupcake topper on a bed of fluffy white buttercream.
Materials
Although pastel icing isn't my go-to palette, I find that I'm working with it more and more. There's something about the soft sweetness that calls to me when I'm working with babies, weddings and magical sweets. To create this soft palette, I use the tiniest amount of Americolor gel in royal icing. This palette used: electric pink, electric orange, lemon yellow, leaf green, sky blue and violet.
My unicorn cutter was from one of my favorite Etsy sellers, Bobbi's Cookie Cutters. The shape is perfect - the horn and nose are not too long and fragile. These could easily be shipped in the mail with little fear of breakage.
And all that sparkly goodness on the pastel mane? Totally edible and delicious! You can pick yours up at Bakery Bling. I was over the MOON when I found this glitter - so much on the market is just non-toxic, which does not equate edible. This one is completely edible and has incredible sheen!
The unicorn is completed with some shiny gold touches. I used my favorite edible gold paint on the horn, snout and closed eyelid. It adds such a shiny sparkle to the cookies - a perfect touch to these magical cookies.
I just adore these magical unicorn cookies so much, I think it's my 80's inner child that misses unicorns. These are fun to make, you'll love having fun with the sweet mane. I hope you make these - let me know if you do! Want to watch my quick video? Click the movie above to see how I created mine.
XO,
Jenny
Categories:
decorated cookie,
girlie cookies,
magical,
pastel,
sugar cookie,
tutorial,
unicorn,
video
My Favorite Thing To Do With Daddy..
Father's Day is around the corner, are you ready? I always struggle with what to give my amazing husband and father. In the end, I think they are similar to moms - they want to know that they are appreciated and loved.
Every year I come up with a new cookie theme set for Father's Day. This year I wanted to create something really special given all the changes in our lives. I know my husband has worked incredibly hard finding a new job, moving his family and doing anything he could to keep us all happy.
My children are at an age now where they can be more involved with gift buying and making. I wanted to include them in this cookie set, after all it's their sweet lives that have made him a father. I was inspired by my son's Preschool Father's Day gift. One of the questions in his card to fill out was, "What is your favorite thing to do with Daddy?"
And what do my children love to do with their Daddy? They love doing archery, riding bikes, being treated to ice cream and playing with him outside. I won't soon forget their little faces as they thought about their answers. That man is so incredibly loved by his children.
My decorated cookies are not unique in our home anymore. I know my husband would have appreciated anything I made, I really wanted something that would be more meaningful. I decided to hand the icing over this year. I baked all their sweet memories and flooded them in white. This step gave the cookies a nice even layer and blank canvas for them to work on.
I made up an assortment of rainbow colored icings and left them alone. They could decorate in any way they wanted. My only rule? Don't squirt icing into our mouth. I know, I know - I'm the meanest mom ever!
They had so much fun and they were ecstatic that I trusted them to make these special treats. This is a great activity to do with him - it's fun and you get to listen to all of their favorite memories. I know that my husband will always remember these sweet treats and how much he is loved by them.
I do recommend giving the kids a small cookie before or after to enjoy. That was the only hiccup and I saw it coming. They love cookies too, lol! Maybe bake a few extra hearts for them to decorate and gobble down after their hard work.
I hope you try this activity, I think it may become a new family tradition for us!
Happy Father's Day to all those men out there that help raise, love and hold our children dear.
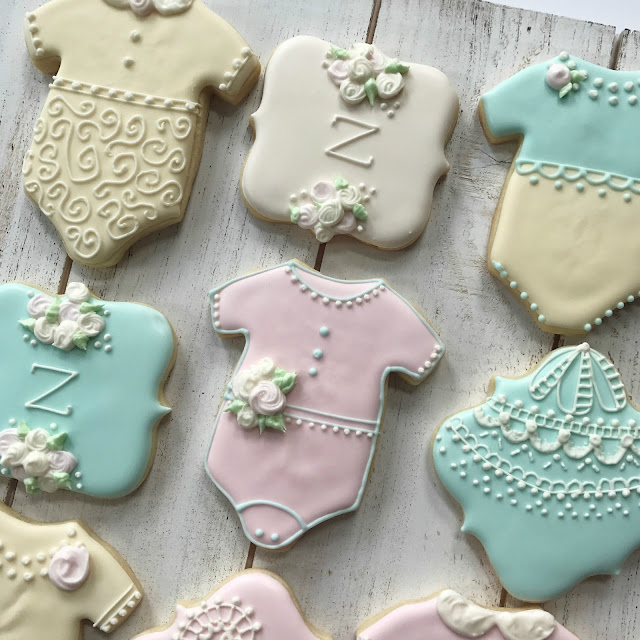
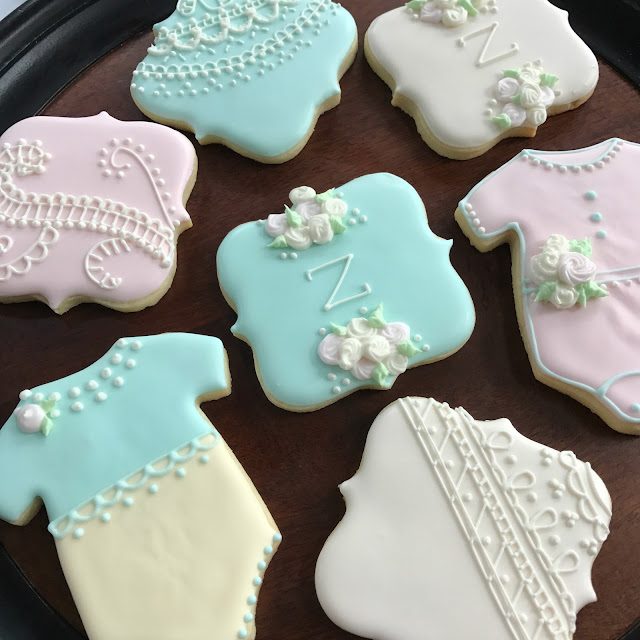
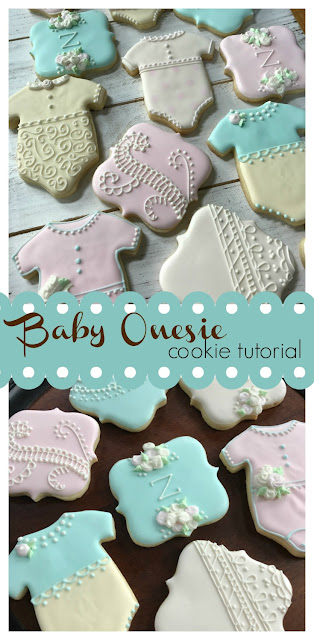
Welcome Baby Zoe
Last week my cousin gave birth to her first baby, sweet little Zoe. Is there nothing sweeter than those baby cheeks, chubby hands and cupid lips? Babies are absolutely one of the best reasons to create decorated cookies - sweet inspiration and those sleep deprived parents can certainly use a sugar boost to keep them going. Although pastels are not my go-to palette, I do love it and it's perfect to welcome a newborn.
Pastel Icing
I work with both Americolor and Wilton gels to color my icing. The key for me to getting a very soft hue is to use the tiniest amount of color. Colors deepen as they dry and it's much easier to go darker than you anticipated. I will use a toothpick to pick up the gel, rather than squirting it into the icing bowl as I normally would. My friend Georganne of Lilaloa has a great post about her technique for pastels. I use her method for creating my grey icing all the time - another color that is easy to make too dark too soon. The key in either method is to go light and slow with the gel.
These cookies are quite easy and will make the new mother feel special and loved. Perfecting these baby onesie treats requires understanding the different levels of icing fluidity. Sweet Sugarbelle has a very informative post on different royal icing consistencies. If you ever have questions, please drop me an email and I would love to help.
What You Need
- baby onesie cookie cutter
- 15 second royal icing in: blue, yellow, green
- Piping royal icing in: white
- Stiff royal icing in: pink
- Icing tips: #14 and #2
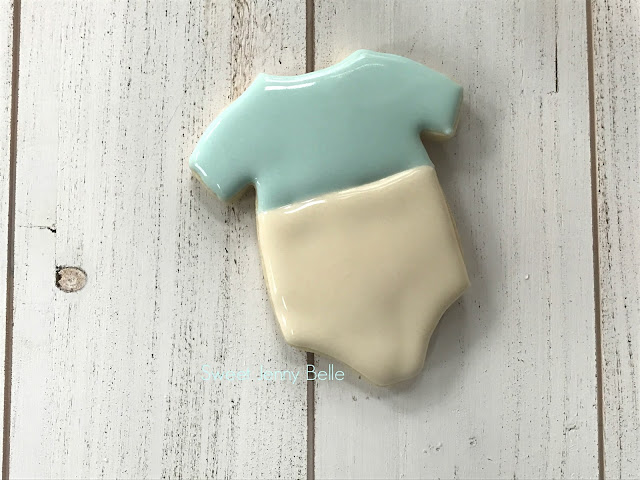
1. I use the same 15 second icing to outline and flood the base of my cookie. You can start with either the blue or yellow. You do not want to dry between icing the colors; if you dry, you will have a hard line between the two and you want them to melt into each other. (See video below for visual clarification)
2. Once the base is flooded, dry for 10 minutes in your dehydrator at 90 degrees or for 2 hours at room temperature. The top of the cookies will have a soft shell, you can begin your detail work, but keep in mind that the cookie is not completely dry - so handle gently.
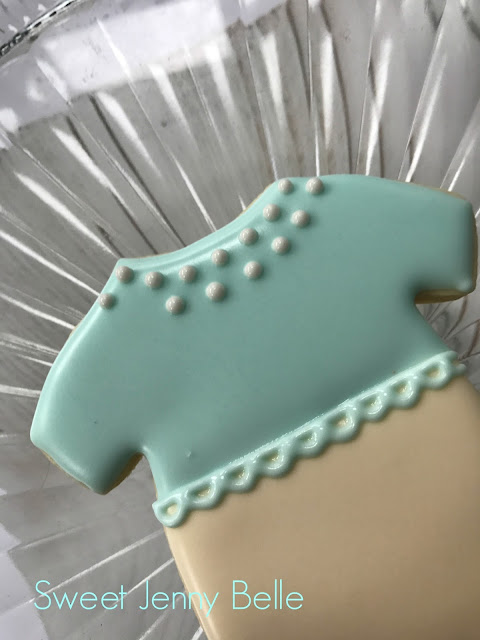
With the same blue flood icing, add dots to the leg openings. Then ice a line where the blue and yellow base meet. Add a sweet little scallop trim to the line.
3. Using your piping thick white icing, decorate the collar with a mock pearl necklace. Leave one dot off on the second strand - this is where you will be adding your rose.
4. Fill an icing bag with tip #14 and the stiff pink icing. Starting in the center of the rose, ice a small circle. (See video below for visual clarification). You could also make these roses in advance on a piece of parchment and "glue" on to the onesie with a dab of fresh icing.
Fill a different icing bag with tip #2 and the green icing. Frost two small leaves coming out from the rose. These are really just small triangles - easy peasy!
And that's all there is to it. Isn't that the sweetest little baby cookie? So many fun possibilities to decorate these little onesies. Change the colors, the trim and it's a whole new look. I guarantee you that new parents will welcome these treats with open arms.
Are you a visual learner? Me too! I made a little video on how I created this cookie. Just click the video above and I will run you through it. Have questions, email me and let's chat! These are way easy and you will be surprised by how many compliments you receive over them.
Don't forget to Pin this tutorial! Are you looking for a royal icing recipe? Look no more, I have a full tutorial over on this post. Baby, Baby, Baby!
XO,
Jenny
The Force Awakens
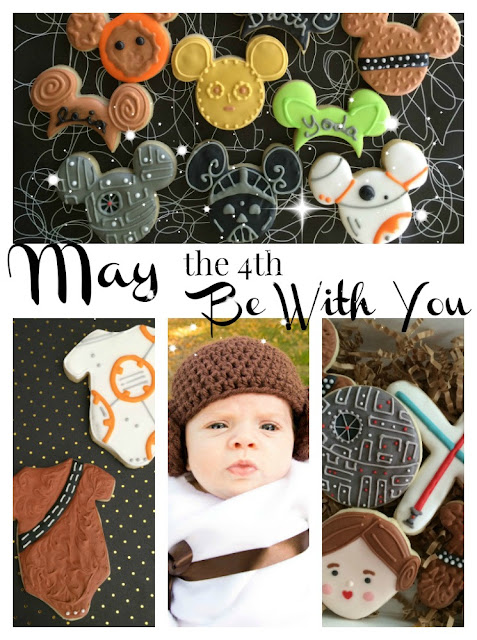
Squee! May the 4th Be with You is just around the corner - it's one of my favorite silly holidays. We are huge Star Wars fans and my family looks forward to special cookies or treats. I try to come up with a new idea to surprise them. We watch all the movies, yes we buy them on Blu-Ray as soon as they come out! All my kids have their favorite of the series, even my toddler is a huge Jedi fan.
Last year my best friend held a baby shower for her sister-in-law that was Jedi themed. I created a collection of Star Wars decorated cookies. Don't you just love the baby Chewbacca? Come read the tutorial on my post here. Chewie has always been my favorite - and you know what they say, let the Wookie win!
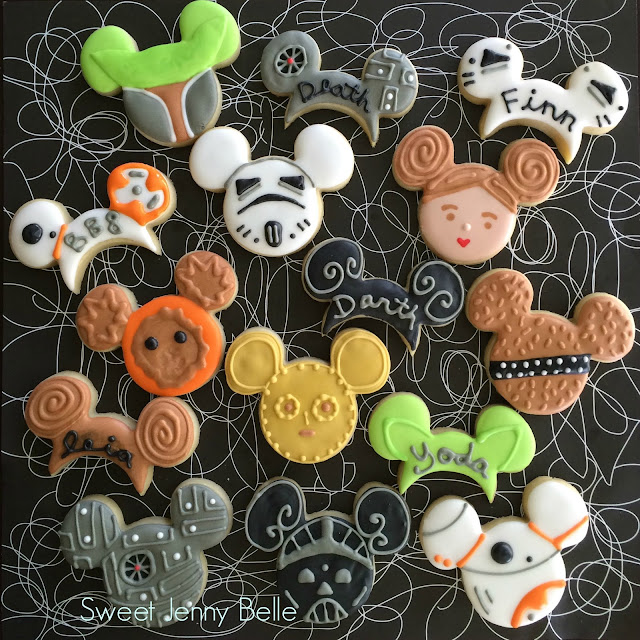
These were the cookies I created for my family last year - aren't they fun? Two of my favorite things - Disney and Star Wars! The heads and hats were both created with a Mickey Mouse cutter - you can pick one up here. I think this would be perfect for a Star Wars themed party favor too. You can read more about these cookies and see my Princess Leia Cake Pop on my original post here.
These maybe my most favorite, that's no star, that's the Death Star! With a circle cutter and some icing, you will amaze the crowd with this treat. I have a fun YouTube video and I think you will enjoy trying this one. Stop by and come over to the dark side.
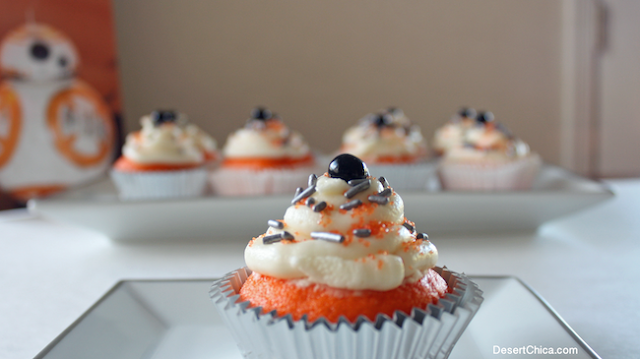
That friend I mentioned earlier, well she is quite the blogger and baker herself. And it's no surprise, she's equally crazy about Disney and Star Wars. Karen specializes in cupcakes that are quick for the home baker, so you can spend more time enjoying them and watching The Force Awakens. Aren't these BB-8 cupcakes darling? I love them so much and I know my kiddos would go crazy to frost their own. Want to make a batch? Stop by Karen's and read up on the details.
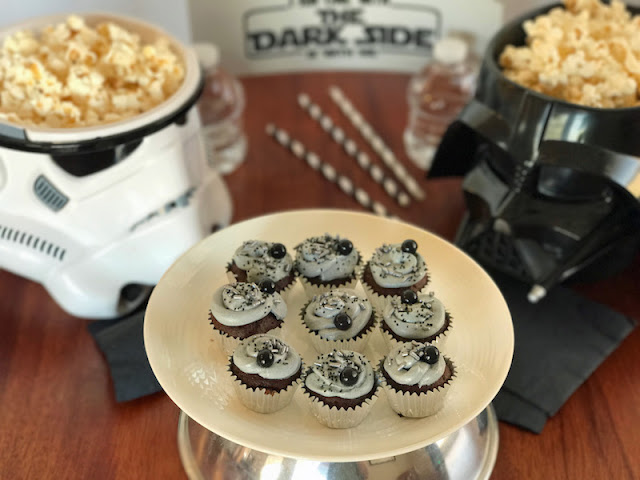
Check out these dark treats - Death Star cupcakes! It's no trap, such a yummy cupcake that would be perfect for this May 4th. What side are you on? I'm proud to be Rebel Scum, but I would be happy to make these for my crew.
Before I started this baking blog, I had a crafting one - All Things Belle. This rebel Princess Leia cap is crocheted and so easy to make. The buns are simply braided and sewn on, but isn't it adorable? I want to make one for myself and can't believe I haven't yet. I am revamping the blog, be sure to stop by for more crafts and quilting in the future!
I hope you are full of fun ideas and baking plans for this May 4th. As for me, I have a new cookie and cupcake design up my sleeve...
Don't forget to Pin this page and may the force be with you.
XO,
Jenny
Categories:
baking,
cake,
cupcakes,
decorated cookie,
geek crafts,
recipes,
round up,
star wars,
tutorials
Circus Animal Cookies - Easy Tutorial
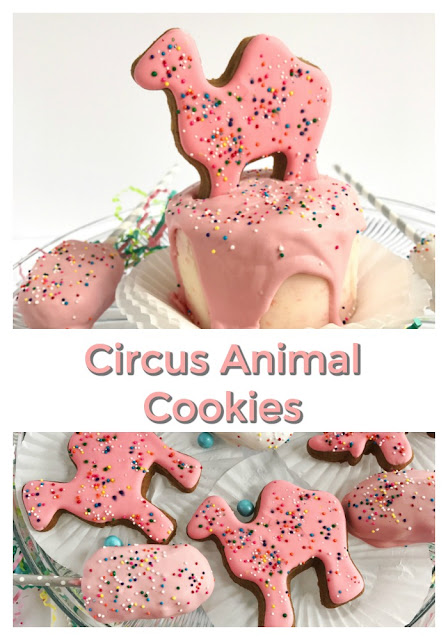
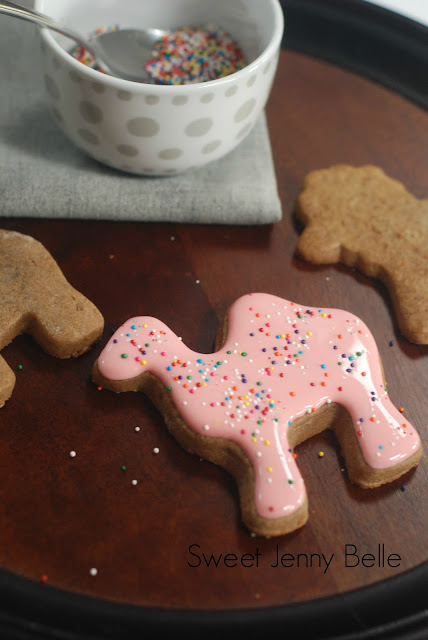
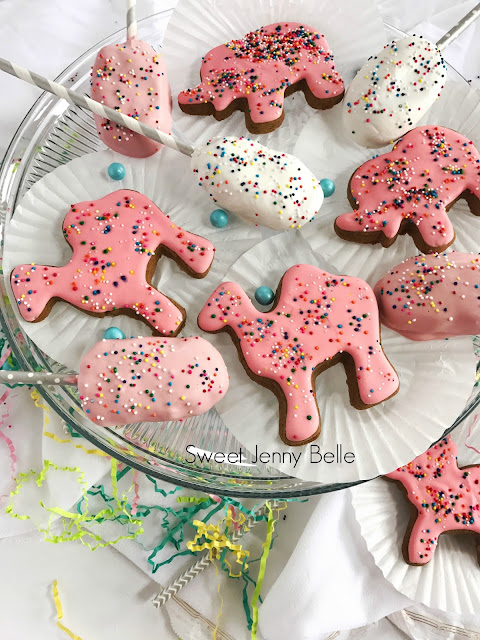
April 18th is National Animal Cracker Day and when I think of animal crackers, my mind races back to my childhood with those small frosted circus animal cookies showered in bright sprinkles. They were my favorite and still are. These cookies are incredibly easy to recreate at home and can be used in fun ways. I graced one of my mini cakes with my favorite pink camels and think it's just adorable. How fun would this be for a baby shower or child's first birthday?
What do you need to bring the nostalgia back in the kitchen?
- cookies in animal shapes (I used my lemon gingerbread and I bought my cookie cutters from Wilton on Amazon)
- pink royal icing in 15 second flow ( I used a touch of Americolor electric pink. My royal icing recipe can be found here)
- tiny rainbow sprinkles
These cookies are so easy and fun, you may want to enlist your children or grand-kids to help. Simply outline and fill the animal cookies with pink royal icing. While it is still wet, gingerly add the sprinkles on top of the cookies. Set the decorated cookies in the dehydrator for 10 minutes at 90 degrees. The color of the sprinkles may slightly bleed into the pink, but it is quite minimal.
Mmm! I just love them and hope you do too.
XO,
Jenny
Categories:
animal cookies,
animal cracker,
circus,
circus animal,
decorated cookie,
pink icing,
tutorial
Buttercream Lamb Cookies
We moved to Vancouver, Washington this past winter and there are large pastures close to our home. I love to see all the farm animals grazing on the lush land. Close to our place there is a home with dozens of lambs out on their field. There are so many baby lambs out there right now - one of my favorite parts of spring.
With Easter right around the corner, I thought it would be the perfect time to make some buttercream lamb cookies. I'm still learning my way around buttercream, so I did use a bit of royal icing on these as well. The two frostings play nice together and provide very different textures. I made a delicious lemon buttercream that is perfectly paired with the vanilla cookies. This icing does crust, but it doesn't harden like royal icing - you won't be able to mail these. They are perfect to bring over for Easter celebration or baby shower brunch.
What do you need to make these?
- vanilla cookies in lamb shapes
- royal icing in ivory and grey
- lemon buttercream icing (recipe below)
- Wilton tip 16 - for lamb fur rosettes
- Americolor soft pink gel
- clear alcohol or vanilla
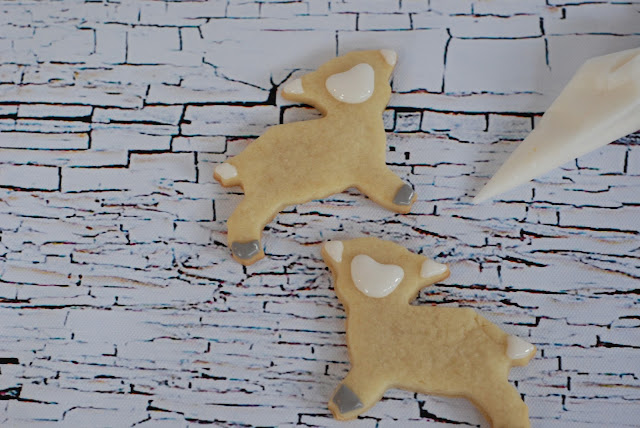
I use tipless bags for my royal icing or you can use the traditional reusable icing bags with a 1 or 2 tip. Using the grey royal icing, frost the hooves of the lambs.
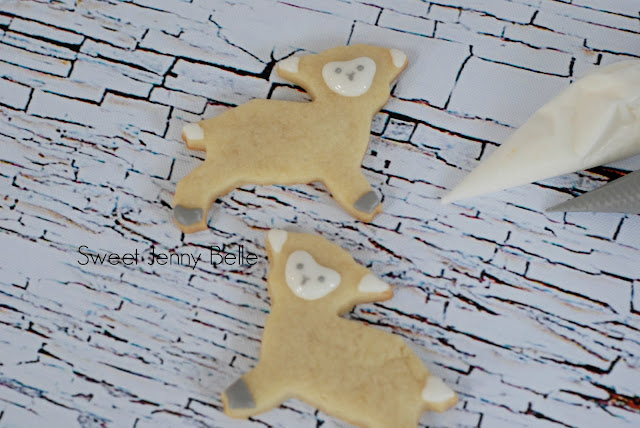
Switch to the ivory royal icing and frost the tail, ears and face. The face of the lamb is like a chubby heart with soft edges.
Before the ivory icing sets, add two small grey eyes and a little line for his mouth. Using a toothpick, carefully drag the corners of the mouth out to give the appearance of a small nose. Place lambs in a dehydrator at 90 degrees for about 10 minutes or allow the cookies to setup, about an hour or two.
Using Wilton tip 16, fill in the rest of the lamb body with little swirls of lemon buttercream. I try to make the swirls fairly small so that it has some definition and the appearance of a furry coat.
Lemon Pie Buttercream Frosting
Materials
- 1 pound softened butter
- 1/4 cup lemon simple sugar syrup
- 6 cups powder sugar
- 2 tbsp. fresh lemon juice
- (optional) Wilton Meyer Lemon Treatology
Directions
- In a large mixer, cream the butter until soft and light. Drizzle the lemon simple sugar into the bowl and blend. Add 3 cups of the powdered sugar and gently mix together.
- Add the lemon juice and remaining sugar, mixing until will combined. Feel free to add a bit more lemon juice if frosting is too thick.
I also added a couple drops of Wilton's Meyer Lemon flavoring to boost the citrus sweetness, but it's optional.
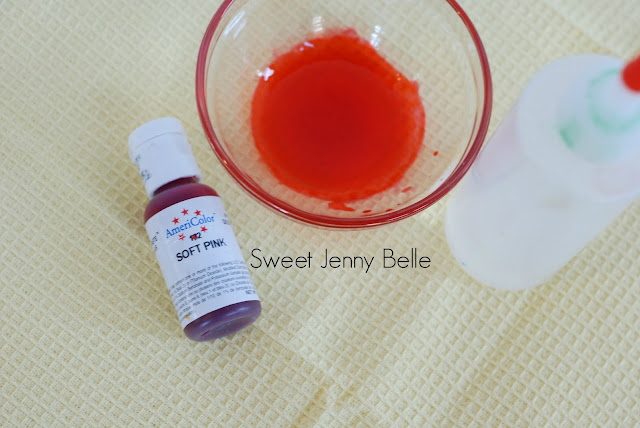
Want to add a bit of pink to the inside of the lamb's ear? In a small glass bowl, mix a drop or two of the Americolor soft pink gel with a few teaspoons of vodka, everclear or clear vanilla. Using a food only paintbrush, paint a small bit of the pink on the ear.
Now your sweet and delicious lambs are all set for the party. Aren't they adorable? Pretty easy and that lemon buttercream frosting will be your new favorite! Save any leftover frosting for my petit four tutorial that is just around the corner.
XO,
Jenny
Subscribe to:
Posts (Atom)


