National Wine Day
Did you know today is National Wine Day? A perfect excuse to break open your favorite bottle and enjoy a glass tonight. Or you know, if you are like me, today may not be too different. I love a glass of Pinot at dinner with some cheese and crackers. I thought it would be fun to recreate one of my favorite treats as cookies. Wouldn't these be perfect for an engagement party or a girl's night out?
In this video tutorial I will show you how to easily create a salted cracker, chunks of cheddar and Swiss, a slice of brie and wine glass. All of these decorated cookies were frosted with flood level consistency royal icing and using my favorite tipless bags. The only cookie cutters you need are: small round, small rectangle and a wine glass. If you didn't have a wine glass, you could also use a basic shape and ice in the design.
To help celebrate National Wine Day, I have a quick giveaway below for two of my new favorite drink books, The Periodic Table of Wine and The Periodic Table of Cocktails. These books are awesome for learning more about drinks and how to create the most delicious libations. I think you will love having them in your cookbook collection.
If you have any questions about how to frost the wine, cheese, and cracker cookies - please let me know!
Materials List
- Salted cracker - round cutter, dark brown flood icing, light brown flood icing and large sugar grains.
- Cheddar chunks - small rectangle cutter, light orange flood icing and red petal dust accent (optional)
- Swiss chunks - small rectangle cutter and ivory flood icing
- Brie slice - pie cutter with crust trimmed off, ivory flood icing and light brown icing
- Wine glass - wine glass cutter, ivory flood icing, grey flood icing and maroon flood icing
a Rafflecopter giveaway
Cheers my friends!
XO,
Jenny
This book giveaway is sponsored by ABRAMS Books, as part of the ABRAMS Dinner Party.
1 Comment
Categories:
cheese,
cookie decorating,
crackers,
decorated cookies,
giveaway,
tutorial,
video,
wine,
wine day
Quilting Thread Decorated Cookies
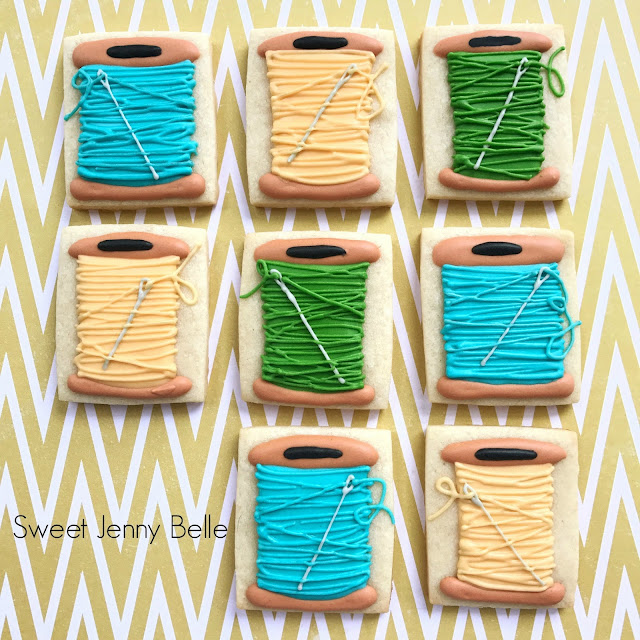
Before I fell head over heels in love with cookie decorating, I spent the majority of my free time quilting and hand sewing. My studio was full of a rainbow assortment of fabric and matching thread. I still love quilting, but share the time with decorating cookies.
This past week a new friend encouraged me to join the Portland Modern Quilt Guild. I was a member of the SLC chapter and it sounded like a great way to get back into my fabric stash. What a fabulous group of quilters and I can't wait to free my sewing machine from the moving box. This past week was also Quilt Market - a time when designers reveal their new fabrics for the season. It seemed like the perfect time to create sewing inspired decorated cookies.
These cookies are pretty easy and I have a video at the end showing you my process. As always, if you have questions, drop me a line or comment!
What do you need?
- mini square or rectangle cookies
- flood icing in: warm brown, black, grey and thread color
- PME tip 00 (for thread strands)
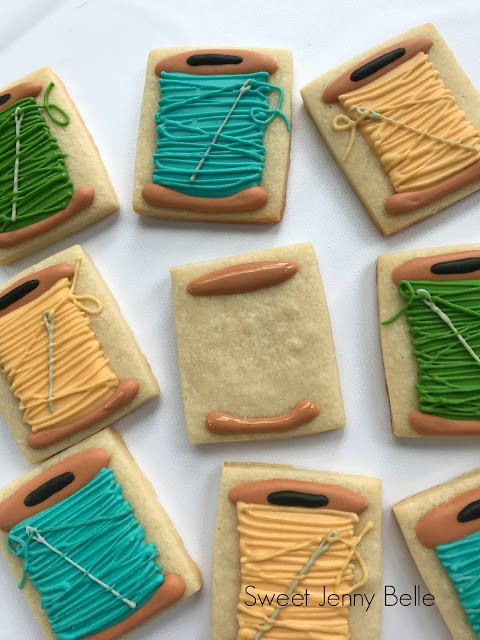
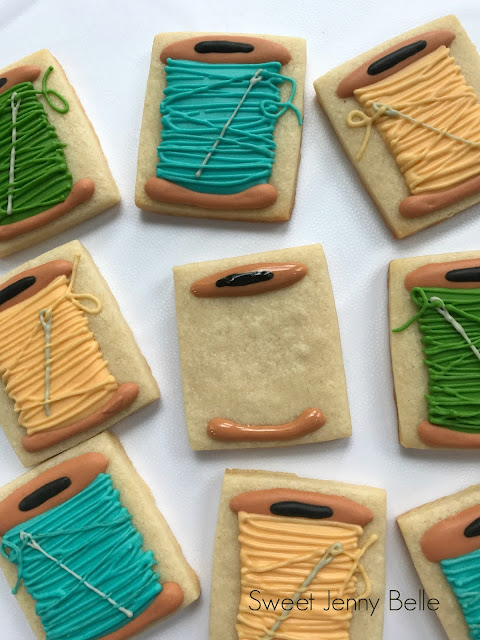
First ice the top and bottom of the thread spools in warm brown. The top part is a long skinny oval and the bottom is almost like a smile. Be sure to use a toothpick or scribe to spread the icing around, this also helps prevent catering.
While the brown icing is still wet, add a small black oval on the top of the spool. This is to give the illusion of the thread spool hole. You can also paint it with black food coloring or use a dark brown gel color.
I chose to add my base thread color while the spool top and bottom were wet. You could wait till they dry or place them in the dehydrator to crust a bit. However, I didn't find it problematic to work with wet by wet.
My thread spool is centered and doesn't reach the wood ends. If your lines are not perfect, don't fret. A lot of the base will be covered with "threads" in the next step.
To create the look of individual threads, I used the same flood icing but with a PME tip 00. This tip is super tiny, but with a flood icing it should come out with no issue. You could use a thicker piping icing if desired. Ice strings of "thread" back and forth on the spool; the frosting lines can be parallel and crisscross.
Now it's time to add the needle, with your grey icing frost a line cross the spool with an eye opening at the top end. Complete the look by icing just a few threads across the needle and one threaded through the eye. Aren't these so fun? They would be great paired with some button cookies too!
I hope you enjoy my little video of how I create these quilting thread decorated cookies. These are pretty easy and are sure to delight the sewing lover in your life. I think these cookies would be super fun as a cupcake topper too!
Happy sewing and eating my friends!
XO,
Jenny
Categories:
cookie decorating,
quilt market,
quilting cookies,
quilting thread,
thread cookies,
tutorial,
video
Cherry Almond Cinnamon Rolls
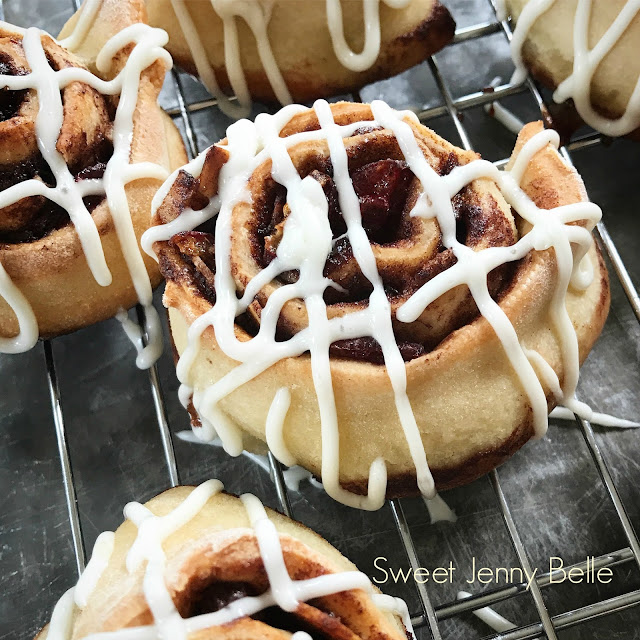
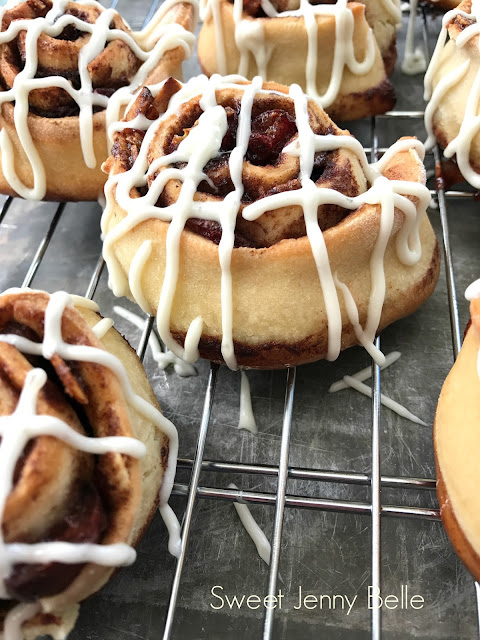
Raise your hand if you love cinnamon rolls! Just as I thought - everyone. Raise your hand if you love pizza! Yup, I see all of you. Well then you are going to love this recipe. Tomorrow morning you could be treating yourself to these warm, cherry rolls and have a scrumptious pizza that night.
My friends at Abrams Books sent me an early copy of "Pizza Camp" by Joe Beddia. So many delicious pizza recipes - you will go nuts. The dough recipe at the beginning produce two loaves - I thought that was perfectly planned to make both a sweet and savory dish. These cinnamon rolls have the soft doughy centers and delicious crispy sides. I covered them in a sweet cream cheese frosting that is sure to be a crowd pleaser.
Yum
Cherry Almond Cinnamon Rolls
By Jenny Rodriguez
These sweet cherry and almond cinnamon rolls will be your next favorite brunch baked treat. These are quickly made with either store bought or home-made pizza dough.
Prep time:
Cook time:
Total time:
Yield: 9 cinnamon rolls
Ingredients:
Store bought or homemade pizza dough (I used the recipe in "Pizza Camp")
6 tbsp. butter, melted
1 cup fresh cherries, chopped
1/4 cup almonds, slivered
1/4 cup white sugar
1/4 cup light brown sugar
2 tbsp. cinnamon
1 tsp. vanilla extract
2 oz. cream cheese
2 tbsp. butter, softened
1/2 cup powdered sugar
3 tbsp. heavy whipping cream
Instructions:
These rolls are so delicious with the fresh cherries and toasted almonds. A perfect breakfast treat to go alongside your hot mug of coffee. I think these would be delicious with peaches and walnuts too.. Hmm.. Maybe another recipe soon!
XO,
Jenny
Categories:
almond,
baked treat,
breakfast,
cherry,
cinnamon rolls,
easy cinnamon roll,
pizza dough,
recipe
Fudge Ripple No-Churn Ice Cream
Summer will be here before we know it! In our home those lazy days are full of swimming, gardening and cooling off with a cold treat. I've never had an ice cream machine so it's never occurred to me to attempt recipes of my favorite cold dessert. The other day I happened across a no-churn ice cream recipe on Pinterest and had to learn more. Friends! It is so easy to make - actually too easy to make, my waistline will not benefit from this discovery. I can't wait to attempt more delicious flavors.
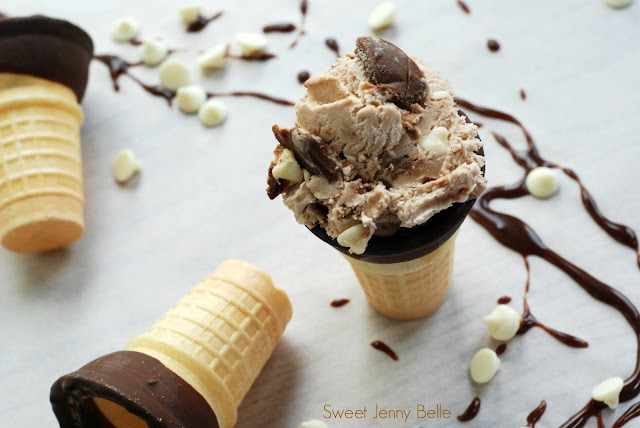
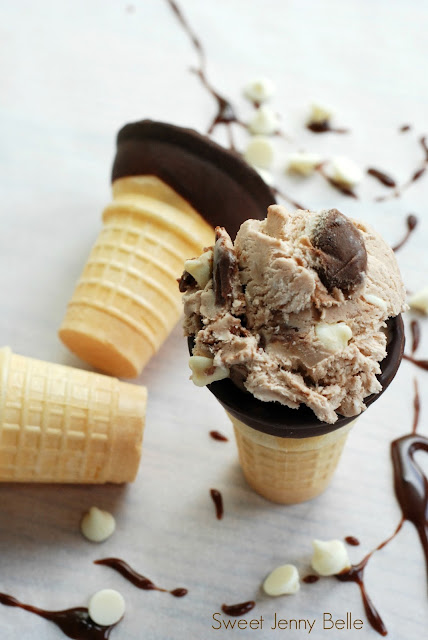
Today I am presenting Fudge Ripple - a vanilla ice cream with ribbons of hot fudge and bites of white chocolate chips. It's sweet, smooth and full of fun textures. You will love it. It's delicious paired with a fudge dipped cone and enjoyed outside on the warm patio.
Fudge Sauce
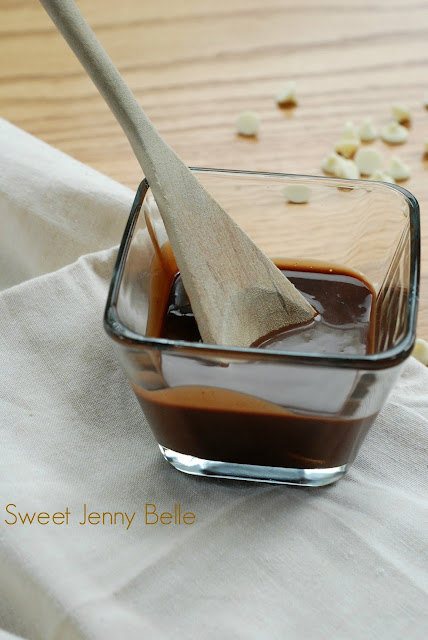
Ok, don't be mad, but I'm not writing a recipe for this. I was originally going to do a store bought fudge sauce, but I didn't have any in the pantry. A quick Google search for fudge sauce and I came across this recipe from Carlsbad Cravings. This sauce is crazy smooth, chocolatey and delicious. It takes close to no time. It honestly would have taken more time to drive to the store and buy something that didn't taste nearly as delicious.
In the future I may experiment with additional flavors tones - like maybe adding some orange or chili spice, but for now this jar of homemade fudge sauce is crazy good. You will have some leftover, pour into a mason jar and refrigerate. Do you love coffee? And a heaping spoonful of this sauce to your morning mug and you will be in mocha heaven!
Ice Cream Storage
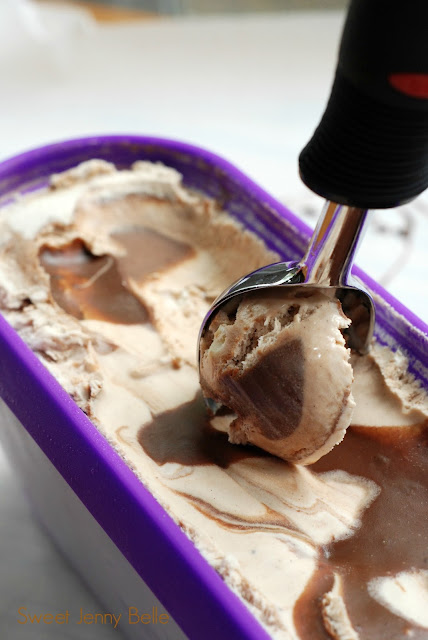
Now that you've made this delicious ice cream, it needs to freeze for overnight (or at least 8 hours). I've seen all kinds of ice cream storage - cake tins, paper bowls and more. As long as you avoid glass containers, you will be good. I wanted something special for our ice cream though. Once I learned how easy it is to make the no churn, I knew that homemade ice cream would become a staple in the freezer. I bought this 1.5 quart ice cream container from SUMO. I adore it! The long slender shape means it takes less time for your treat to be scoopable and it fits perfectly in the freezer. Two dessert covered thumbs up!
Yum
Fudge Ripple Ice Cream
By Jenny Rodriguez
An easy, creamy delicious no-churn ice cream layered with homemade hot fudge sauce and chunks of white chocolate. Beyond perfect served in a fudge dipped cone.
Prep time:
Cook time: (freeze overnight)
Total time:
Yield: 1.5 quarts
Ingredients:
5 minute fudge sauce
2 cups heavy cream
14 oz. can sweetened condensed milk
1 cup white chocolate chips
Instructions:
Don't forget to Pin this recipe - I know you will want it for later this summer. There are a million different flavor combos you could invent. I'm playing with a strawberry rhubarb crumble ice cream for later this month. I can't wait to experiment and report back the delicious findings.
XO,
Jenny
Categories:
chocolate,
chocolate chip,
fudge ripple,
ice cream,
ice cream recipe,
no churn,
white chocolate
Fresh Peach Kahlua Cupcakes
One of my favorite things about living here in the Northwest are the amazing farmer's markets. The fresh fruit and veggies up here are insane! What's your favorite summer time fruit? Mine is fresh, juicy peaches. When I was a little girl I wanted to sell them at a country side road stand in Missouri, where we lived at the time. I guess times haven't changed all that much. I still love peaches and want to share it with all of you.
Peaches
For this recipe, I choose to use white peaches. They are sweet and gorgeous, but buyer beware that they are indeed softer than their yellow sisters. *Don't let your toddler toss them in your bag or you will be sad when you get home.* What is the difference between white and yellow? Not much these days, though historically the white peaches were tangier. Feel free to go with the peach of your preference or which ever one your farmer has a better deal on.I used these same peaches for the puree that goes into the buttercream. Everything gets cooked and it develops into a gorgeous pinky peach color. You may want to consider that as well if you are going dye-free on the buttercream as I did.
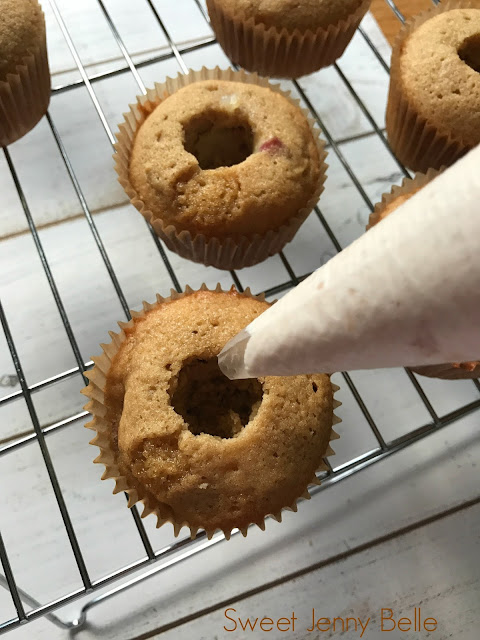
When I create cupcakes, my family is all about the frosting. More frosting, more frosting, more frosting. Yup. To help them in their quest for more buttercream, I now scoop out a small bit in the center of the cupcake and fill it up with deliciousness. The extra cake is not wasted - it makes a tasty snack for the baker or you can use it for cake pops! I do use a fun little tool to make it easier, I love this cupcake corer - so quick.
Cupcake Decorating
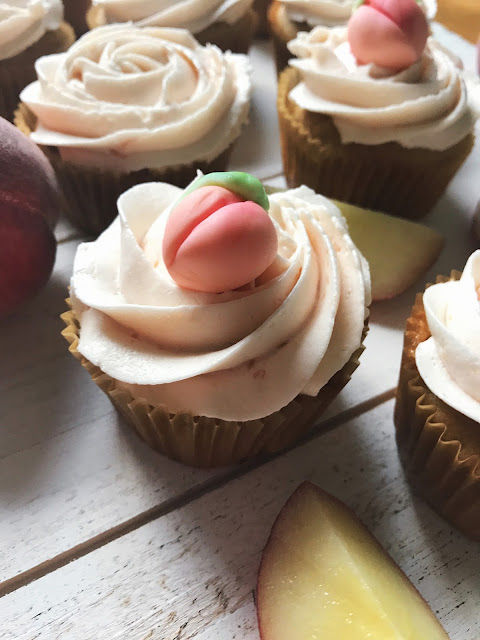
I made some quick little peach fondant decorations for the cake. I just love modeling with fondant these days and always looking to improve my skills. My kids love eating it too - blech, not for me, but glad they enjoy it! I just love how it looks and that because it's edible, I can have fun with it on food. These are pretty darn easy, but if anyone would like a tutorial, please let me know and I would be happy to create an additional post all about it.
The buttercream roses could not be easier or more beautiful. Truly all you need is a frosting bag and a 1M tip. This magical icing tip can be found at your local craft store in the baking aisle or you can pick one up over on Amazon. If you start in the center of the cupcake and make a simple swirl - ta da, you have a gorgeous rose! Seriously nothing easier in the world.
Yum
Fresh Peach Kahlua Cupcakes
By Jenny RodriguezA soft and light cupcake full of fresh peach chunks, topped with a lighter than air peach buttercream. These are the perfect dessert for a summer party or baby shower.
Prep time: 15
Cook time: 20
Total time:
Yield: 12-18 cupcakes, depending upon size
Ingredients:
3/4 cup unsalted butter, softened
1 cup brown sugar, packed
1/2 cup white sugar
2 large eggs
1 1/2 cups finely chopped peaches
2 cups all purpose flour
2 tsp. baking powder
1/2 tsp. salt
1/2 tsp. cinnamon
1 tsp. vanilla
1/4 cup almond milk (or milk of your choice)
1/4 cup Kahlua (can be substituted with rum or additional milk)
Peach buttercream frosting*
Instructions:
Peach Buttercream Icing
- 1 cup unsalted butter, softened
- 2 cups powder sugar
- 2/3 cup peach puree*
- 1/8 cup brown sugar
In a mixing bowl, whip all ingredients until your frosting is light and fluffy. I usually beat my frosting on medium-low for 5-10 minutes depending upon how cold my butter was. If your frosting is too thick, you can thin it down with a bit more peach puree or milk. Leftovers need to be refrigerated or frozen to prevent spoiling.
Peach Puree
- 3 medium peaches, coarsely chopped
- 2/3 cup white sugar
- 1 cup water
In a small pot combine peaches, sugar and water. Bring to a boil over medium heat. Lower heat to low and simmer for 30 - 45 minutes. Pulsate peach mixture in food processor until you have a fine puree. Allow puree to cool to room temperature then refrigerate until needed.
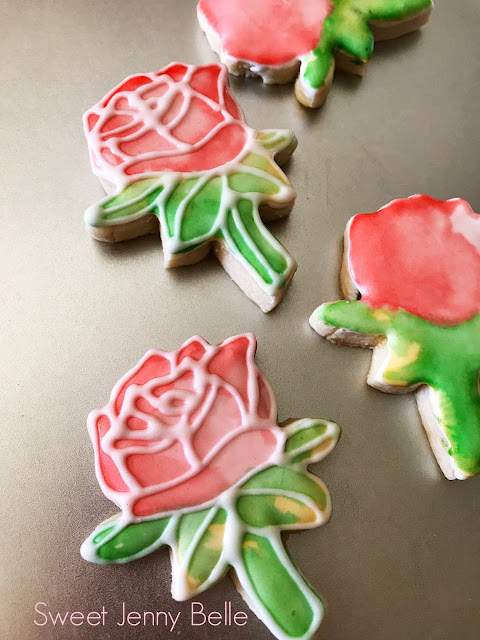
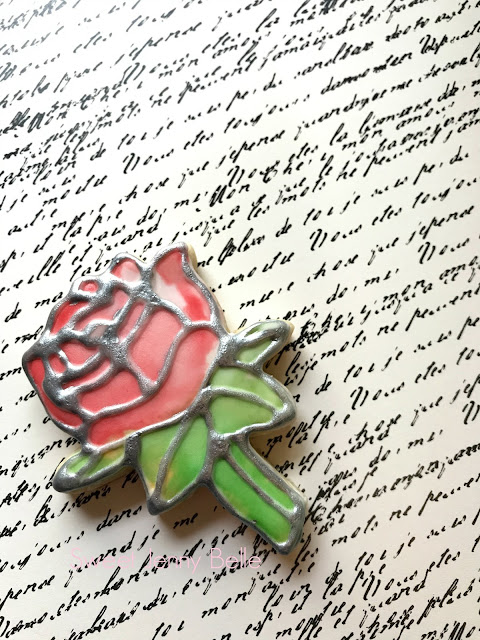
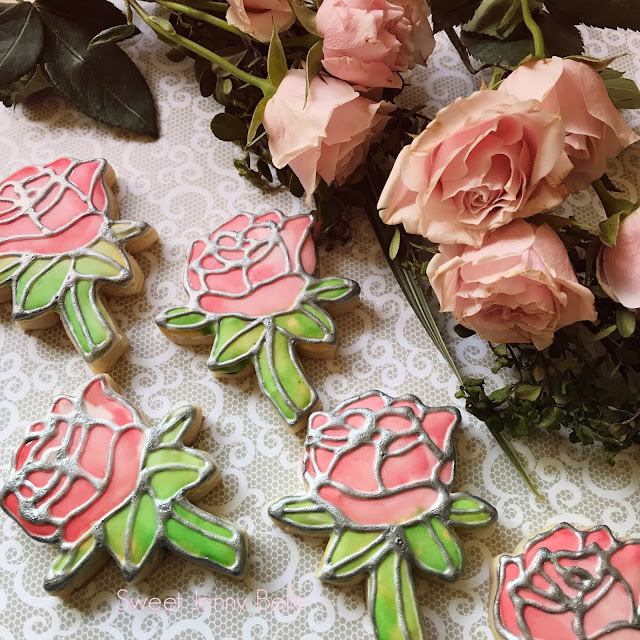
Stained Glass Rose Cookies
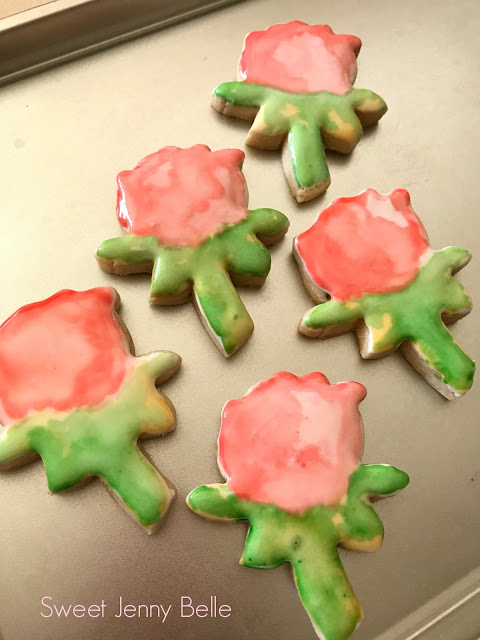
Mother's Day is just around the corner and I'm busy working on a few more gifts. My family is so lucky to be surrounded by such amazing women. My grandmother is alive and well - I feel so blessed that my children have been able to know their great grandmother. She has a gorgeous rose garden that she tends to with such care. I thought it would be wonderful to create some cookies for her. These stained glass rose cookies are easy and so beautiful!
My rose cookie cutter is from the Cookie Cutter Kingdom - don't they have the cutest cutters? I love them! First flood all the cookies in a 15 sec white royal icing. Allow to dry for 2 hours or pop into a dehydrator for 15 minutes at 90 F.
For these cookies I used food gel watercolors. My friend has an amazing tutorial on how to create these over at The Painted Box. These are so fun - you will want to paint all the cookies! After you paint the cookies, allow them to dry for a bit.
Next outline the shape and details of the rose with the same white icing. Now this is a lot looser than I would normally use for detail piping, however you are trying to mimic lead soldering. Soldered stained glass joints are a bit more thick and thin with spots of pooling. Those thick and imperfect lines are what you are looking for and will be more realistic.
Once again, allow the cookie to dry for a few hours or pop into the dehydrator at 90F for 10 minutes. Now very carefully, paint the raised lines with an edible silver food paint. You can find a similar one to what I've used on Amazon over here. The "lead" painting will take some time. If you are running behind schedule, you could use a grey or black piping instead of the painted white icing to give the effect as well.
These will be a cookie your friends and family won't soon forget. They are pretty easy, but they are unique and are sure to delight! Do you want to see how I made them? Click the video box above to see my fast paced cookie decorating movie.
Don't they just shimmer? I also considered using a pearl sheen on them to have it glisten and sparkle even more. Maybe next time!
Don't forget to Pin this fun tutorial - it would be perfect for Beauty and the Beast parties, wedding showers and more!
Are you looking for my royal icing recipe? Click over there to read all the details.
Here's to all the women in our lives that love us, inspire us and pave the road for us.
XO,
Jenny
Blueberry Rhubarb Morning Muffins
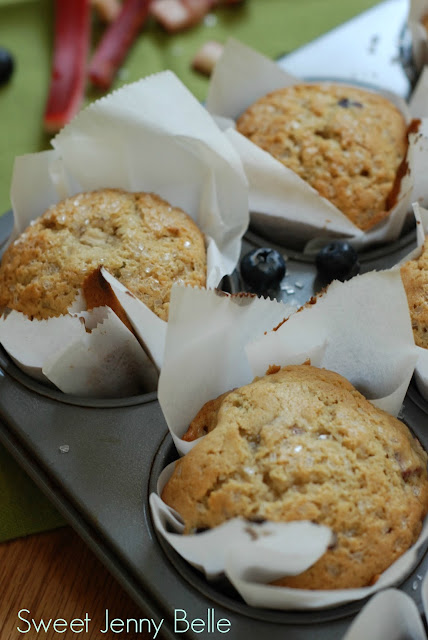
A long time ago, I remember shopping at Costco with my Mum and she picked out a strawberry rhubarb pie. I remember her eyes were lit up and she exclaimed that it was a rare treat. Rhubarb? A treat? I've never had it before, but I knew what it looked like. Rhubarb reminded me of a celery stick that had been dyed red. I didn't have high hopes. But it was delicious! It was like eating a bite of juicy summer nights.
When we moved to the Northwest, another blogger had told me that there would be amazing rhubarb this summer. I've been keeping my eyes open and eager to try a baked treat with them. This Sunday morning I went shopping with my daughter and we found gorgeous red rhubarb stalks and juicy plump blueberries. I remembered my mom's delight over the pie and wanted to create something equally delicious and reminiscent of summer, but something that would be perfect for a Mother's Day brunch,
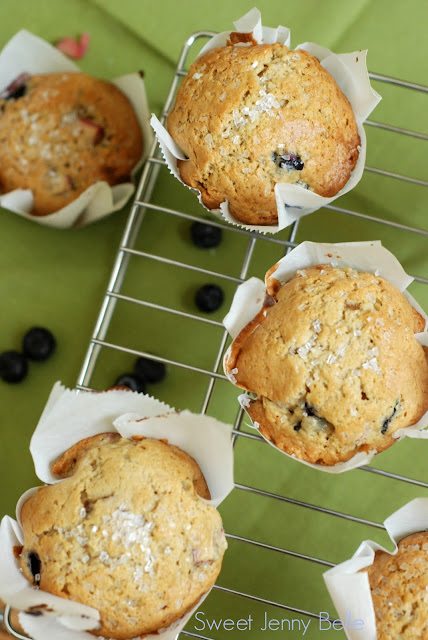
Aren't these rustic muffin cups the best? And they are so easy - they add such a fun touch to your breakfast plate. All you do is cut approximate 5" squares of parchment paper. Wrap them over the top of a champagne glass to get the shape and then place into a muffin tin. The Kitchn has a great visual tutorial if you would like to see more details. So easy and such a fabulous presentation for your yummy breakfast!
Yum
Blueberry Rhubarb Muffins
By Jenny RodriguezThese summer muffins are the perfect morning treat for Mother's Day or a brunch with friends. They are chock full of deliciousness and topped with chunky sugar. If you make this in advance, you may want to heat them right before eating - so delicious with a small pat of butter melting on the hot muffin.
Prep time: 15
Cook time: 25
Total time:
Yield: 1 dozen muffins
Ingredients:
2 cups all purpose flour
1 tbsp. baking powder
1 tsp. baking soda
1/2 tsp. salt
1/2 cup white sugar
1/2 cup brown sugar
1/2 cup butter, softened
1 large egg
1/2 tsp. vanilla extract
3/4 cup almond milk (or milk of your choice)
2/3 cup blueberries
2/3 finely chopped rhubarb
chunky white sugar for topping
Instructions:
Don't forget to Pin this recipe, I have a feeling you are going to want to make these yummy muffins more than once!
What's your favorite way to use summer rhubarb?
XO,
Jenny
Yum
Paint-Your-Own Cookie Tutorial
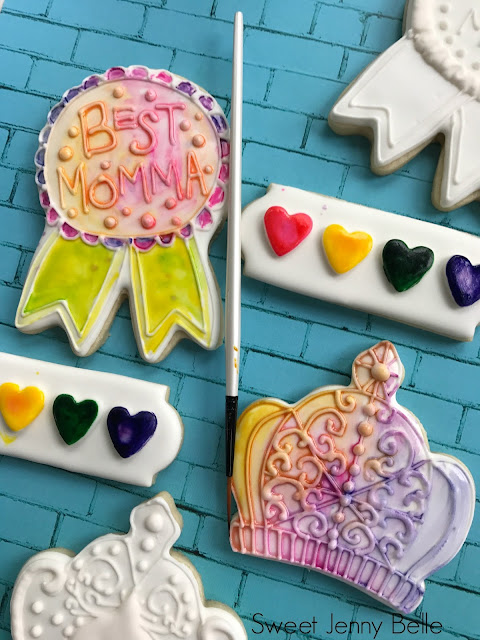
Mother's Day is just around the corner and these paint-your-own (PYO) cookies are so easy to make. I think a treat set of these would be perfect for a Momma and kiddo to paint together. This idea is wonderful for other holidays too - Halloween, Thanksgiving and more. It's a fun activity for all and then a yummy dessert. I typically make my PYO cookie palettes with my food airbrush, but it's not necessary - this tutorial does not use one. All you need are some cookies, white royal icing, a bit of white fondant and airbrush food gel.
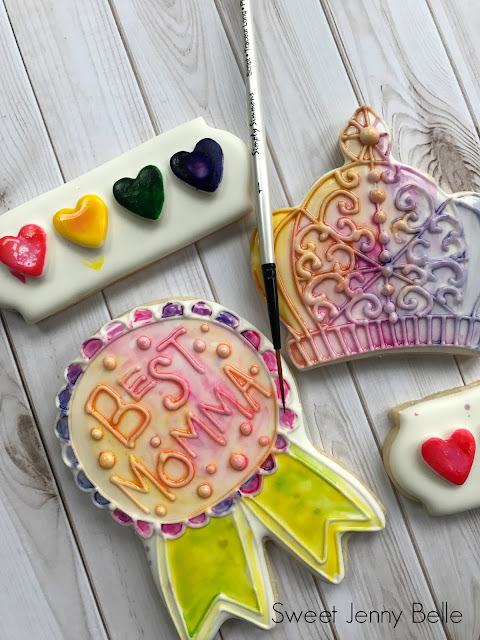
For this Mother's Day I thought it would be fun to create a crown since my Mum is the queen bee and a fancy show ribbon. Wouldn't a bouquet of flowers with a mason jar cookie set be adorable as well? Or maybe hearts? Or a home - because it's our mothers that make that home so cozy. Sigh - a ton of ideas and a million cookie cutters.
Create and bake whichever cookies remind you of sweet Mom. Once they are nice and cool, flood them in a 15 second pure white royal icing. If you need a recipe for Royal Icing, hop on over here for my favorite! Allow to dry for 2 hours or place in a dehydrator for 10-15 minutes at 90F.
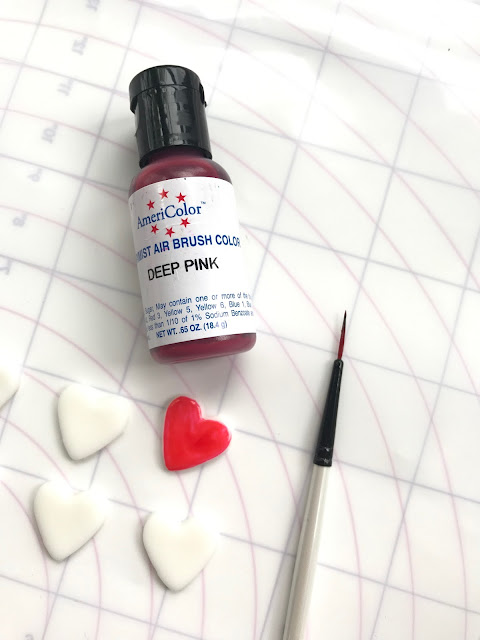
Next you will need to roll out a small bit of white fondant. You can use store bought or homemade marshmallow fondant - either works perfect. Roll to 1/8" thick and using a tiny cookie cutter, cut out your palette shapes. For my cookie, I used a 1/2" heart cookie cutter and cut 4 pieces out.
Now generously paint the heart with an airbrush food dye with a food-only brush. Sometimes the color painted on the fondant is significantly darker than what it will look like painted later, so don't be alarmed if it is seems off.
Continue to paint the whole palette with the colors of your choice. I tend towards a lot of primary colors since these can be mixed later on the cookie itself. Allow the fondant palette to dry for 12 hours or overnight. If you do not have that much time allotted for drying, just be careful with them and aware that the color can bleed on to your fingers.
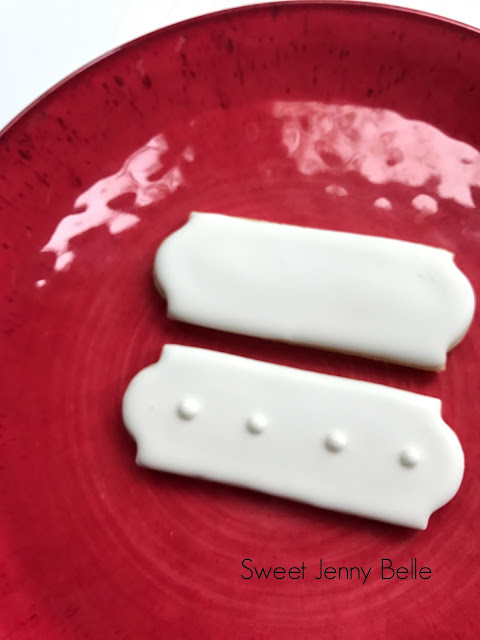
Prepare your palette cookie by adding drops of fresh royal icing where you will be placing the fondant palette colors. This is the "glue" that will hold them in place.
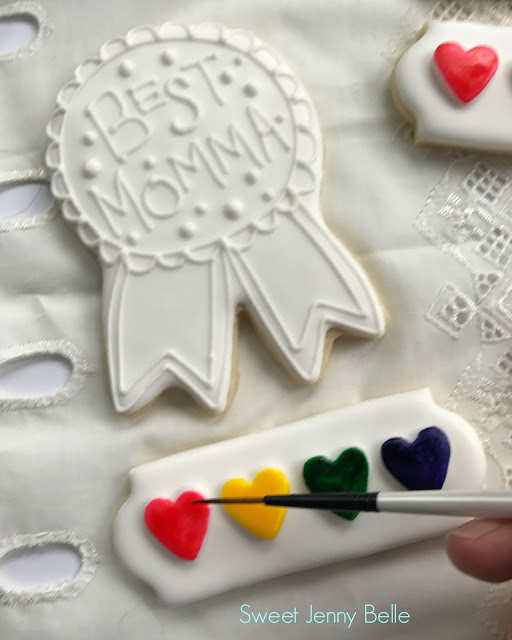
Isn't that pretty? You can make them smaller to add more colors or ice a frame around the cookie. I err on the simpler side for a clean look, but feel free to sass it up.
Now it's time to have some fun with your cookies that will be painted. In the past I have done outlines with a think black piping icing - this gives the cookie an almost coloring book feel. You can see samples in my Halloween post over here. I wanted to try a different look and did all the outline piping white. I really love the effect! Allow the icing to dry for 6-8 hours or pop in the dehydrator again for 15 minutes at 90F.
All you need is a small bit of water to activate the color palette and then it's only limited by your imagination. The colors can be blended together on the cookie for some really cool effects. Such a fun way to enjoy your cookies for a bit longer. You could paint the piped parts different, but I loved the relief appearance of a general watercolor all over.
Aren't these beautiful? I just know any Mom would enjoy a little painting and cookie nibbling with their sweet babies.
Don't forget to PIN this tutorial - you will be wanting to do this for the next holiday! It's a fun way to keep kids and adults entertained during dessert. My kids are always asking for these special cookies.
XO,
Jenny
Subscribe to:
Posts (Atom)


