Showing posts with label DIY. Show all posts
Showing posts with label DIY. Show all posts

Golden Snitch Cookie Tutorial
It's that time of year again when my amazing friend Marissa of Rae Gun Ramblings hosts her annual Harry Potter bonanza for all us Muggles! There will be tutorials, inspiration, giveaways and so many amazing blogs. If you have ever dreamed of attending Hogwarts or playing quidditch, then you will have to join us for the magical blog ride.
I thought long and hard about what kind of cookie I should create for this year's Harry Potter party. I wanted to create a set that might speak to an older crowd - refined and dramatic. I worked with a small color palette and selected a few visuals to play with.
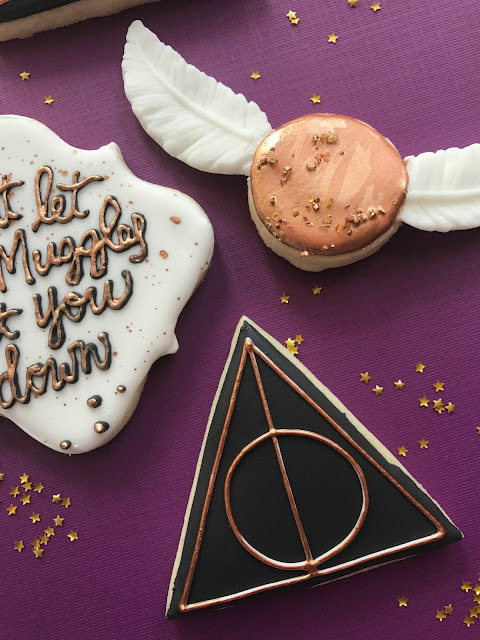
There has always been something about the quidditch game that I loved. Or maybe I just want to ride around on a broom. I wanted to create a golden snitch that would be magical and a new cookie style. For this snitch, I've added white fondant wings for such a fun way to create dimension.
Materials needed:
- small round cookie
- white royal icing
- edible gold paint
- white fondant
- silicone wings mold
- edible gold stars or sprinkles (optional)
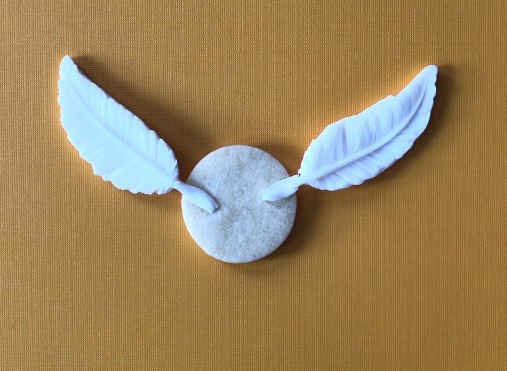
The first thing you need to do to create these flying, golden snitches is to create the fondant wings. For this cookie, I actually used a feather mold - I liked how delicate and long this particular mold was. Take a small bit of fondant (homemade or store bought) and push it into the mold. Place in the freezer for about 10 minutes and pop out. I let mine stiffen up overnight in a cool, dry box. Create 2 feathers for every snitch cookie that you are making.
Next you will position the fondant feathers on your round cookie. Gently press and flatten the fondant ends of the feather into the cookie. This will help anchor the fondant and make it more stable.
Now outline and flood the cookie in white icing. You will completely ice over the area of the fondant that is on the cookie. Allow to dry for 10 minutes in a dehydrator at 90 F or at room temperature for a few hours.
Your final step to finishing the golden snitch cookie, is painting a layer of edible gold paint all over the cookie. There are a number of options on the market, just choose your favorite. This adds such a gorgeous sheen. Your Hogwarts fans, old and young, will love this sparkly cookie! I added a few edible stars and sprinkles while the gold paint was still wet.
Aren't these quidditch cookies a showstopper?! They are fragile, so please treat with care and this may not be one that you will want to ship. However, they are easy to make and I think are my most favorite Harry Potter cookie to date.
Want to see a quickie video of creating the cookie? Unfortunately it was crazy overcast in Washington and my hands have a weird purple hue in the video, but it will show you exactly how I made mine.
DON'T FORGET!
This year's Happy Harry Potter giveaway winner will give a fun package including:
- $50 Amazon.com gift card
- Make Love Not Horcruxes Book Bag and Custom Hogwarts House Tie Necklace from Rae Gun Shop
- Bookish Swag from CrateJoy which has loads of HP and fandom related subscription boxes.
- Four Stunning Harry Potter Printables from Sisters What!
Are you looking for more Harry Potter cookie tutorials? Come visit the Harry cookie I created last year! And of course, lots more inspiration cookie ideas for your party or client!
XO,
Jenny
2 Comments
Categories:
contest,
cookie decorating,
decorated cookie,
DIY,
giveaway,
golden snitch,
harry potter,
hogwarts,
magical,
tutorial
Welcome Baby Zoe
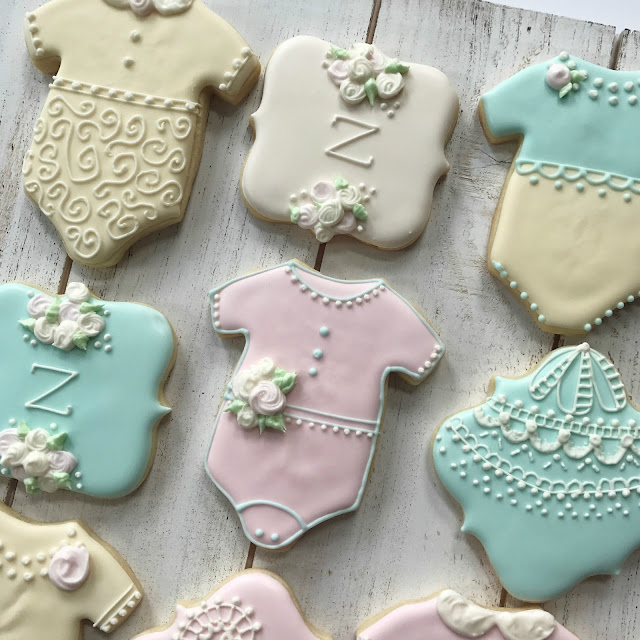
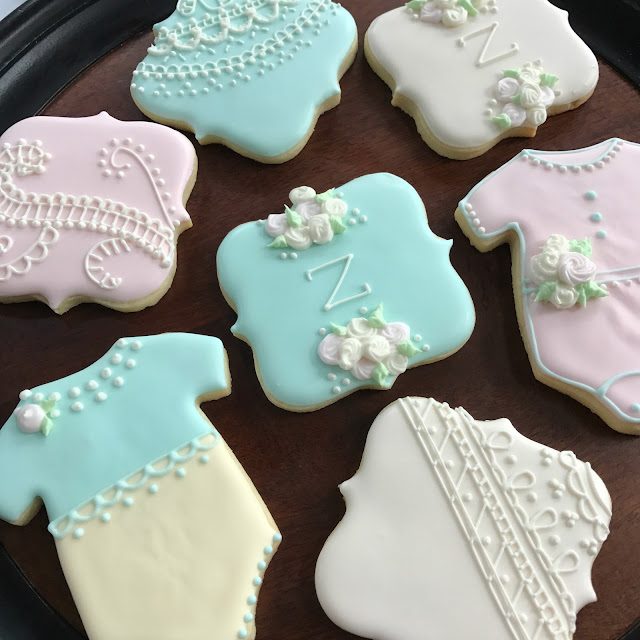
Last week my cousin gave birth to her first baby, sweet little Zoe. Is there nothing sweeter than those baby cheeks, chubby hands and cupid lips? Babies are absolutely one of the best reasons to create decorated cookies - sweet inspiration and those sleep deprived parents can certainly use a sugar boost to keep them going. Although pastels are not my go-to palette, I do love it and it's perfect to welcome a newborn.
Pastel Icing
I work with both Americolor and Wilton gels to color my icing. The key for me to getting a very soft hue is to use the tiniest amount of color. Colors deepen as they dry and it's much easier to go darker than you anticipated. I will use a toothpick to pick up the gel, rather than squirting it into the icing bowl as I normally would. My friend Georganne of Lilaloa has a great post about her technique for pastels. I use her method for creating my grey icing all the time - another color that is easy to make too dark too soon. The key in either method is to go light and slow with the gel.
These cookies are quite easy and will make the new mother feel special and loved. Perfecting these baby onesie treats requires understanding the different levels of icing fluidity. Sweet Sugarbelle has a very informative post on different royal icing consistencies. If you ever have questions, please drop me an email and I would love to help.
What You Need
- baby onesie cookie cutter
- 15 second royal icing in: blue, yellow, green
- Piping royal icing in: white
- Stiff royal icing in: pink
- Icing tips: #14 and #2
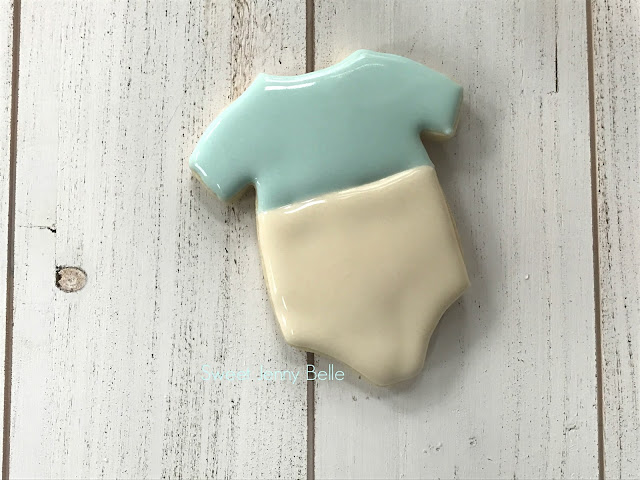
1. I use the same 15 second icing to outline and flood the base of my cookie. You can start with either the blue or yellow. You do not want to dry between icing the colors; if you dry, you will have a hard line between the two and you want them to melt into each other. (See video below for visual clarification)
2. Once the base is flooded, dry for 10 minutes in your dehydrator at 90 degrees or for 2 hours at room temperature. The top of the cookies will have a soft shell, you can begin your detail work, but keep in mind that the cookie is not completely dry - so handle gently.
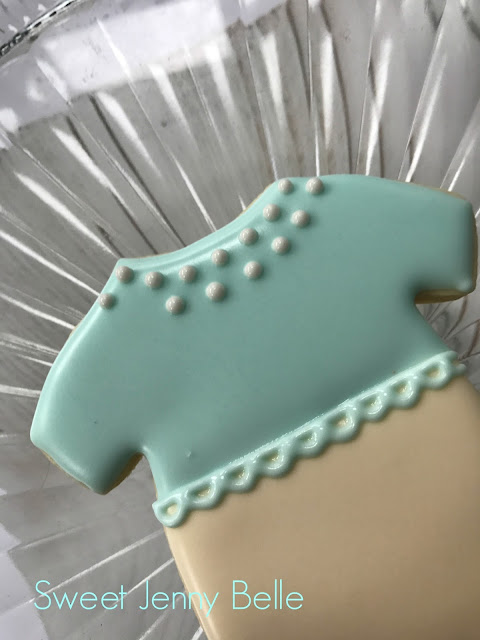
With the same blue flood icing, add dots to the leg openings. Then ice a line where the blue and yellow base meet. Add a sweet little scallop trim to the line.
3. Using your piping thick white icing, decorate the collar with a mock pearl necklace. Leave one dot off on the second strand - this is where you will be adding your rose.
4. Fill an icing bag with tip #14 and the stiff pink icing. Starting in the center of the rose, ice a small circle. (See video below for visual clarification). You could also make these roses in advance on a piece of parchment and "glue" on to the onesie with a dab of fresh icing.
Fill a different icing bag with tip #2 and the green icing. Frost two small leaves coming out from the rose. These are really just small triangles - easy peasy!
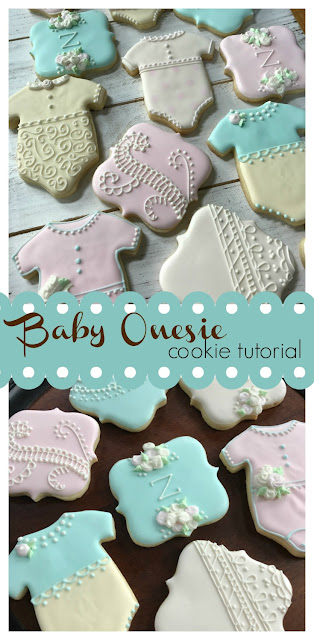
And that's all there is to it. Isn't that the sweetest little baby cookie? So many fun possibilities to decorate these little onesies. Change the colors, the trim and it's a whole new look. I guarantee you that new parents will welcome these treats with open arms.
Are you a visual learner? Me too! I made a little video on how I created this cookie. Just click the video above and I will run you through it. Have questions, email me and let's chat! These are way easy and you will be surprised by how many compliments you receive over them.
Don't forget to Pin this tutorial! Are you looking for a royal icing recipe? Look no more, I have a full tutorial over on this post. Baby, Baby, Baby!
XO,
Jenny
Subscribe to:
Posts (Atom)


