


Showing posts with label cupcakes. Show all posts
Showing posts with label cupcakes. Show all posts

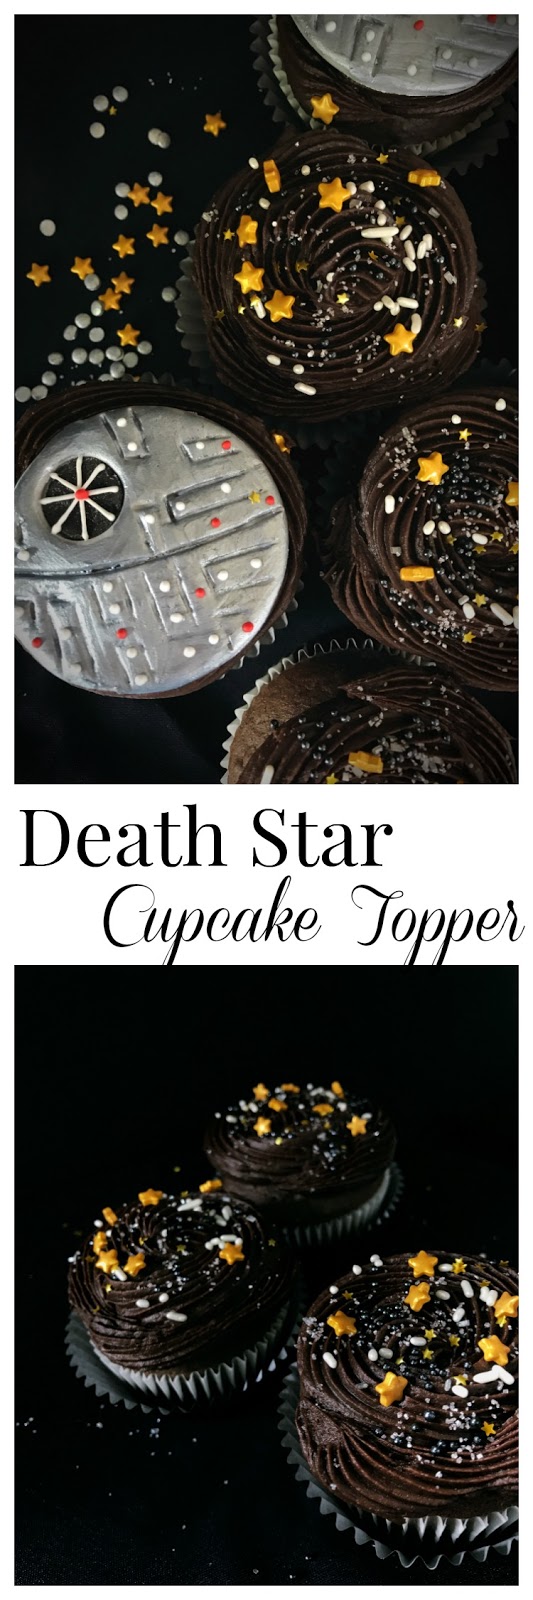
Death Star Cupcakes - A Fondant Tutorial
As soon as I see that little silver ball, I can immediately recall Darth Vadar's theme music. That's no moon, that's the Death Star. I've been contemplating what my special dessert would be on May The 4th Be With You. Decorated cookies have been the treats for the last three consecutive years, I wanted to do something a bit different. I was inspired by my best friend, Karen's Death Star Cupcakes, but of course want to put my own spin on it. I have a little experience with fondant and need to improve my skills. Cupcakes seemed a lot less intimidating than a whole cake! If you are new to fondant as well, I think you will find that this an ideal project.

Materials Needed
- grey fondant
- black fondant
- 2 1/2" circle cutter
- small icing tip (it doesn't matter which size, you will be using the base to cut)
- fondant tools
- edible silver food paint
- white royal icing
- red royal icing

When you begin, you will need to condition your fondant. While wearing gloves (fondant will pick up every bit of dust or color on your hands!) roll the fondant until it is soft and pliable. If you find your fondant is too soft, knead in a small bit of powder sugar. You can also add tylose to stiffen it, but be aware that it will become permanently more brittle and not the tastiest.
Roll out your black fondant to 1/8" thick. I use fondant roller rings on my small pin to make sure that it is consistent. If your fondant, mat or pin get sticky, sprinkle more powder sugar. Take a small icing tip - any size is ok, and cut out small circles using the base of the tip. Set these pieces aside on a pan to stiffen.

Now roll out your grey fondant to 1/4" thick - these are thicker because they are the base piece and will be resting on the cupcake. Cut out large circles with the 2 1/2" cookie cutter, these will be the Death Star.

I start the design of my Death Star by first creating the focal center line. It is a curved line since it is supposed to resemble a sphere. You can create the line lightly with a fondant tool until it's perfect. Then go back and make the line very obvious, but do not cut the fondant into two pieces. Next with the same icing tip, cut out a small circle on the left side of the top part of the Death Star.

Carefully lay your black circle into new hole on the Death Star. Use your large ball tip fondant tool to smooth it in. (See video below for visual explanation)
Create lines of the death star with one of your preferred fondant tools. They are open rectangles of various shapes and orientation. You want the lines to be prominent, but not cut into the fondant all the way. You could also use a toothpick to create these lines.

Now that Death Star needs to become shiny - so shiny! You can leave it grey if you like, but I wanted some metallic shine on those babies. There are a number of silver edible paints on the market, Wilton also has an edible silver spray located on the baking aisle of most craft stores. If you do use the spray paint, spray first and then add the black dot or it will all be silver.

Isn't it fun?! You could leave it just like this. It would be a perfect edible decoration for your dark chocolate cupcakes. However, if you enjoy working with royal icing or want to try a bit, I add a few more details in red and white. I have a large royal icing recipe here, but I have also used this small batch recipe and it would be perfect for this project.

Using the white icing in a no tip frosting bag or even a Ziploc, add a few lines on the black hole of the Death Star and a few white dots to resemble lights.

Add just a few more dots of red in the center of the black hole and surrounding areas.
Boom!
Your menacing Death Star is ready to be gobbled down by your Rebel Scum while you watch the movies at home. It isn't hard or intimidating - it may even peak your fondant interest as it did mine!
Want to see me create the topper in a video? There is fast paced one above - just click the picture. If you have any questions, be sure to email me!
You can create these toppers days in advance. Store them in a cool, dry and dark spot - placed on a cookie sheet in the cold oven is perfect. Sunlight will alter the colors of your fondant quicker than you will imagine. Place toppers on cupcakes right before serving. The yummy oddles of buttercream underneath will soften the fondant and if put on too soon, they will become limp.

XO,
Jenny

The Force Awakens
Squee! May the 4th Be with You is just around the corner - it's one of my favorite silly holidays. We are huge Star Wars fans and my family looks forward to special cookies or treats. I try to come up with a new idea to surprise them. We watch all the movies, yes we buy them on Blu-Ray as soon as they come out! All my kids have their favorite of the series, even my toddler is a huge Jedi fan.

Last year my best friend held a baby shower for her sister-in-law that was Jedi themed. I created a collection of Star Wars decorated cookies. Don't you just love the baby Chewbacca? Come read the tutorial on my post here. Chewie has always been my favorite - and you know what they say, let the Wookie win!

These were the cookies I created for my family last year - aren't they fun? Two of my favorite things - Disney and Star Wars! The heads and hats were both created with a Mickey Mouse cutter - you can pick one up here. I think this would be perfect for a Star Wars themed party favor too. You can read more about these cookies and see my Princess Leia Cake Pop on my original post here.

These maybe my most favorite, that's no star, that's the Death Star! With a circle cutter and some icing, you will amaze the crowd with this treat. I have a fun YouTube video and I think you will enjoy trying this one. Stop by and come over to the dark side.

That friend I mentioned earlier, well she is quite the blogger and baker herself. And it's no surprise, she's equally crazy about Disney and Star Wars. Karen specializes in cupcakes that are quick for the home baker, so you can spend more time enjoying them and watching The Force Awakens. Aren't these BB-8 cupcakes darling? I love them so much and I know my kiddos would go crazy to frost their own. Want to make a batch? Stop by Karen's and read up on the details.

Check out these dark treats - Death Star cupcakes! It's no trap, such a yummy cupcake that would be perfect for this May 4th. What side are you on? I'm proud to be Rebel Scum, but I would be happy to make these for my crew.


Don't forget to Pin this page and may the force be with you.
XO,
Jenny
Subscribe to:
Posts (Atom)

